• Home

In My Kitchen: Cooking in Place -- Cabbage Minestrone

3/17/2020

1 Comment

 
Picture
​Hello Everybody,
During this prolonged period of social distancing, I’m going to try to post a few recipes a week, since cooking at home is one thing that more of you will be doing.
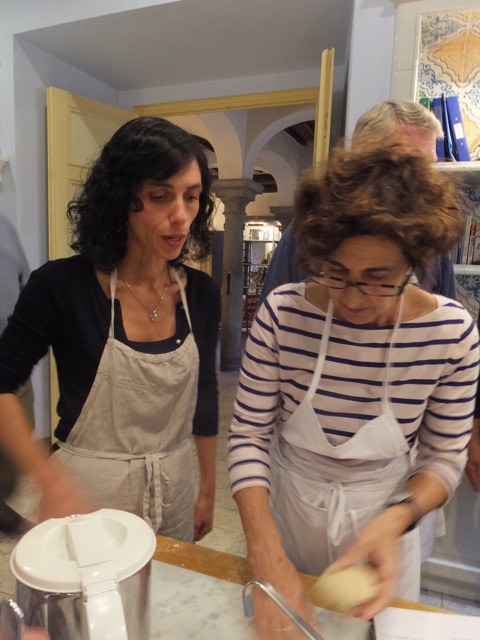
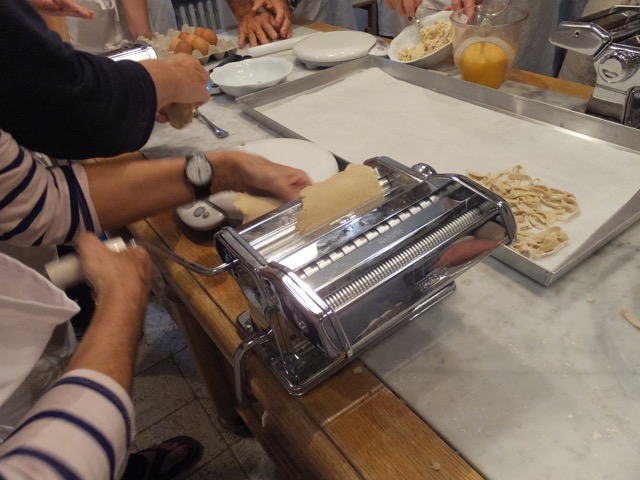
It’s been interesting to me to see what is emptying fastest from the supermarket shelves. Canned goods, tuna, eggs, beans and rice, pasta, meat – especially chicken. Funnily, this morning the only grain to be had at my local supermarket was red quinoa, which is one of my favorites. Don’t know why that one didn’t go.
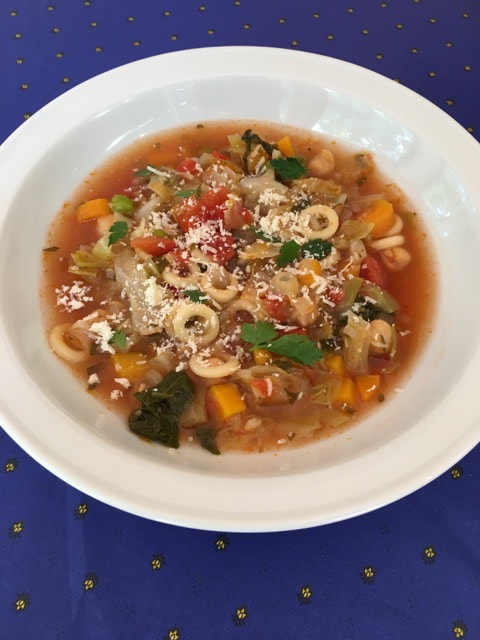
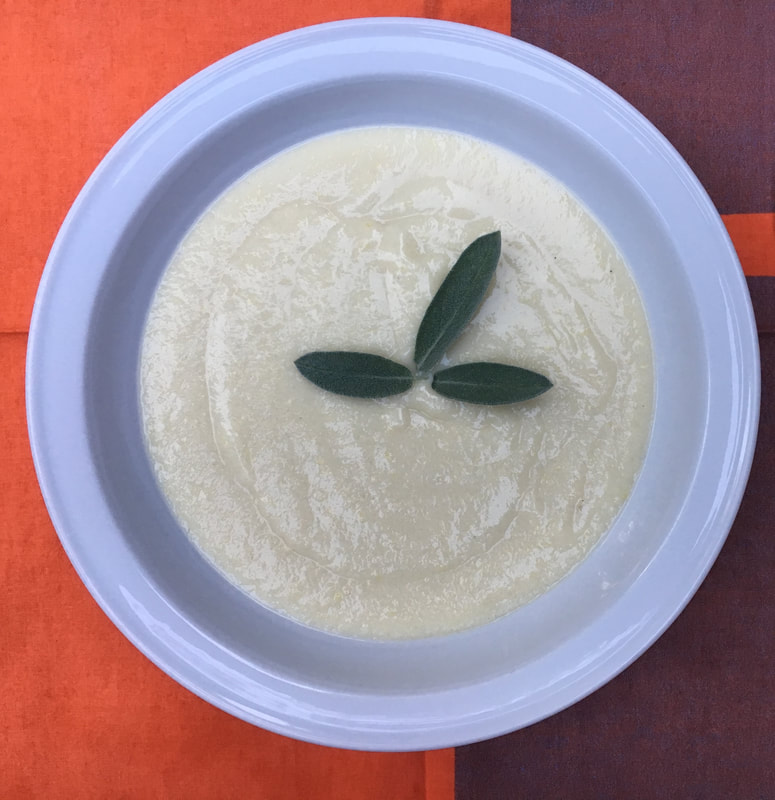
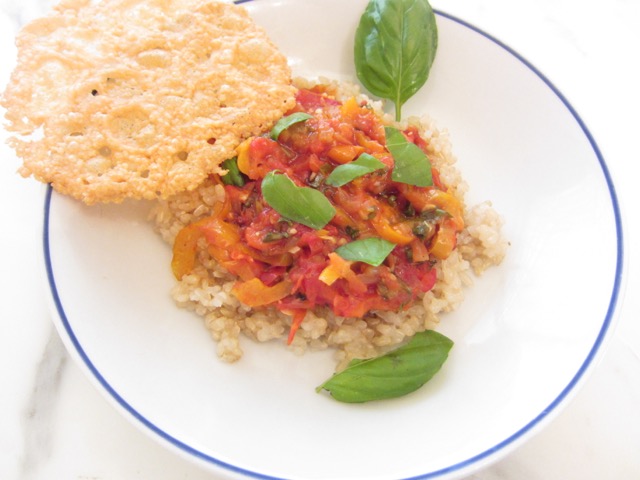
As for produce, the shelves at my market are well stocked and the farmers market was terrific on Sunday. I bought a huge cabbage and I have half of it left over after making this soup. It’s a comforting, easy soup that will feed a family of 4 to 6, or 2 people for 3 days.
 
Cabbage Minestrone
2 tablespoons olive oil
1 large onion, finely chopped
1 large carrot, peeled and finely chopped
1 celery stalk, finely chopped (optional)
2 tablespoons chopped fresh parsley
2 to 4 garlic cloves, to taste, minced
1 (14-ounce) can chopped tomatoes, with juice
1 to 1 1/4 pounds cabbage, outer leaves removed, cored and coarsely chopped (about 1/2 medium-large cabbage)
6 cups water
A bouquet garni made with 1 Parmesan rind. 1 bay leaf, and a sprig or two of thyme
Salt and freshly ground pepper
1 1/2 cups cooked chickpeas (1 can, drained and rinsed)
1/2 cup fresh shelled peas or thawed frozen
1/2 cup elbow macaroni, or small rings or shells
Freshly grated Parmesan for sprinkling
 
1. Heat the oil over medium heat in the soup pot and add the onion, carrot, celery and parsley. Add a pinch of salt. Cook, stirring often, until the mixture is fragrant and the vegetables tender, about 8 to 10 minutes. Stir in half the minced garlic and cook, stirring, for another minute or so, until the garlic begins to smell fragrant. Add the tomatoes and their liquid and cook, stirring occasionally, for 5 to 10 minutes, until the tomatoes have cooked down a bit. Add the cabbage, stir together for a couple of minutes, and add the water and bouquet garni. Season with about 2 teaspoons salt and bring to a simmer. Cover and simmer over low heat for 45 minutes.
2. Add the remaining chopped garlic, the chickpeas, peas, and pasta. Cover and continue to simmer until the pasta is cooked al dente, usually about 10 minutes. Taste the soup and adjust salt. Add freshly ground pepper to taste. Serve with Parmesan sprinkled on top.
Advance preparation:
The soup keeps for a few days in the refrigerator and freezes well. Pasta will get soft.
1 Comment

In My Kitchen: Ratatouille While the Vegetables Are Still There

10/2/2019

0 Comments

 
Picture
​You would think that after 50 years of making ratatouille I’d have settled on a recipe by now. But I’m still tweaking. It’s a time consuming dish, no matter how you go about it, and I am always aiming for the most efficient method that yields the best ratatouille. Of course, I am convinced that my latest version is the best; until I try another version a year later.
With very little time left at our farmers markets for eggplant, tomatoes, summer squash and peppers, I recently made this one for a dinner party. I wanted to get most of the dishes done a day or two ahead, then just oven steam a salmon fillet on the day of. Ratatouille gets better by the day, until you’ve eaten it all up, so it was the perfect choice. I made it, leisurely, on a Sunday afternoon. It couldn’t have been better – big flavors but nothing aggressive, soothing textures, the ultimate vegetable comfort food.
 
Ratatouille
1 1/2 pounds eggplant
Salt
4-5 tablespoons olive oil
3/4 pound (2 medium) onions, thinly sliced
4 to 6 large garlic cloves, minced or pressed
3/4 pound mixed sweet red and yellow peppers, cut into slices about 3/4 inch wide by 1-1/2 inches long
1 1/2 pounds mixed yellow and green zucchini, sliced about 1/2 inch thick (if very thick, cut in half lengthwise)
1 pound tomatoes (I prefer pulpy tomatoes like romas), peeled, seeded and coarsely chopped
1 bay leaf
1 to 2 teaspoons fresh thyme leaves or 1/2 to 1 teaspoon dried thyme
1/2 teaspoon dried oregano (more to taste)
Freshly ground pepper
2 to 4 tablespoons slivered or chopped fresh basil, to taste
 
1. Cut the eggplant into 1/2-inch cubes. Salt generously and place in a colander in the sink. Let sit for 30 minutes to an hour. Meanwhile preheat the oven to 425ºF and line a baking sheet with parchment or foil. Brush with olive oil.
2. Rinse the eggplant and squeeze dry in a clean dish towel. Transfer to the baking sheet and toss with 2-3 tablespoons olive oil. Spread in an even layer and place in the hot oven. Roast for about 20 minutes, stirring halfway through, until the eggplant is soft and some of the edges are lightly browned. Remove from the oven, fold the parchment or foil in half so the eggplant continues to steam, and set aside.
3. Get out a large, heavy flameproof casserole or soup pot and a large, heavy skillet. Heat a tablespoon of the remaining oil over medium heat in the skillet. Add the onions, and cook, stirring often, until just about tender, about 5 minutes. Stir in the peppers and a generous pinch of salt. Cook, stirring often, until the peppers have softened and smell fragrant, about 5 to 10 minutes. Stir in half the garlic and cook for another minute, then season with salt and pepper and transfer to the casserole.
4. Heat the remaining oil in the skillet over medium-high heat and add the squash, more salt to taste and some freshly ground pepper, and cook, stirring, until the squash begins to look translucent, about 5 to 10 minutes. Stir in the remaining garlic, stir together for a minute, or until fragrant, and transfer to the casserole. Add the eggplant to the casserole along with half the tomatoes. Add plenty of salt (I use a teaspoon), the bay leaf, thyme, oregano, and stir everything together. Place over medium heat and bring to a simmer, stirring.
5. Turn the heat to very low, cover the casserole, and let the ratatouille simmer for 45 minutes, stirring often to make sure that the vegetables don’t stick to the bottom. Add the remaining tomatoes and simmer for another 15 minutes. Taste and adjust seasoning. If possible, allow to cool, and refrigerate for a day before serving.
6. Remove the bay leaf, reheat gently and stir in the basil just before serving.
0 Comments

Thanksgiving Favorites

11/14/2017

2 Comments

 
Picture


​I hope I’m not posting this too late. Perhaps you already have your menu down for Thanksgiving. But just in case, it occurred to me today that I should share my Thanksgiving favorites with you. These are the dishes I make every year:
 
Sweet Potato Apple Puree
I should make this more than once a year, it is so irrestible: a sweet/tart, smooth puree of baked sweet potatoes and apples, seasoned with lime juice and a little honey, enriched with a little butter and crème fraîche or yogurt.

Mushroom Ragout “Gravy”
I call it mushroom ragout “gravy” because I’d rather spoon that over my turkey than actual gravy. It’s a savory stew made with an assortment of mushrooms cooked in a rich, deep porcini broth.
 
Savory Cornbread Stuffing
I don’t make it every year (see the next stuffing) but it is definitely a favorite. First I make a wonderful rustic cornbread, which I crumble and season with sage, onion, celery – the usual. You can keep it separate and warm it in a baking dish, or stuff the turkey with it. Try using Anson Mills cornmeal for an exceptional cornbread.
 
Wild Rice Stuffing with Almonds and Mushrooms
Another favorite, I’ll be making this one this year. It’s savory, great in or out of the turkey. Vegetarians at the table will appreciate it but meat eaters will love it too.
 
Wild Rice Salad with Celery and Walnuts
Another option for wild rice, a grain I love to include in my Thanksgiving buffet, is this salad, with a lemony vinaigrette, lots of thinly sliced celery, and walnuts. I love the contrast of textures.
 
Cranberry Sauce with Chiles
If you want to add a spicy twist to your cranberry sauce, try this.
 
Cranberry Orange Relish
Otherwise, here’s my age-old recipe for an uncooked, honey-sweetened cranberry sauce with oranges and pecans. We call it “pucker up cranberry sauce.” I eat leftovers with yogurt.
 
Pecan Pie
Thanksgiving isn’t Thanksgiving without pecan pie. I make this one, but I also make it with honey only, without the Lyle’s golden syrup called for in this recipe. It’s not overly sweet and cloying; it’s all about the nuts.
 
In addition to these, we usually start with a salad. I like bitter greens, such as endive, or arugula or chicory or frisée. Something simple, and not too much of it. 

I also include a simple green vegetable on the buffet, really simple. Blanched green beans are a favorite. But steamed or blanched broccoli also works. Keep it light.
And enjoy!!!!


2 Comments

In My Kitchen: Soups for Bob

9/19/2017

2 Comments

 
​My boyfriend Bob had some serious oral surgery and had to be on a liquid and soft foods diet for six weeks. So I got out the blender and kept it out, and I’ve been busy making soups. I loved going back to some of my favorite recipes – a pureed white bean soup finished with a swirl of pistou that I’ve been making since the 1970s, (one of Bob’s favorites); a creamy puree of corn soup that is pure, sweet corn (no cream at all, pure corn), the broth made from simmered corncobs; classic gazpacho that we gulped down on hot end-of-summer days; a fragrant, herbal puree of lettuce, leeks and peas, with lots of mint and tarragon blended into the mix. I kept remembering more soups that I had in my arsenal – curried lentil, black bean chili, pureed red pepper and potato. I was almost sad when the restricted diet came to an end – though Bob is incredibly happy now that he can sink both sides of his jaw into solid foods.
Picture
Classic Gazpacho
There is nothing more perfect than this on a hot summer day. Drink it from a cup, plain with no garnishes, or serve it in a bowl.
 
1 slice red or white onion
1 ounce stale French bread, crusts removed (2 to 4 thick slices)
1 pound ripe tomatoes, cored and peeled
2 to 4 garlic cloves, to taste
2 tablespoons olive oil
1 to 2 tablespoons sherry vinegar or wine vinegar (to taste)
1/2 to 1 teaspoon sweet paprika (to taste)
1/2 to 1 cup ice water, depending on how thick you want your soup to be
Salt and freshly ground pepper
 
Garnishes (optional)
1/2 cup finely chopped cucumber (more to taste)
1/2 cup finely chopped tomato (more to taste)
1/4 cup chopped fresh basil or parsley
1/2 cup finely chopped green pepper
1/2 cup small croutons
1 hardboiled egg, finely chopped
 
1. Place the onion in a bowl and cover with cold water. Let sit 5 minutes, drain and rinse.
2. Place the bread in a bowl and sprinkle with enough water to soften it. Let sit 5 minutes, until soft enough to squeeze, and squeeze out the water.
3. Combine the bread, tomatoes, garlic, onion. Olive oil, vinegar, paprika, and salt in a blender and blend until smooth. Taste and adjust seasonings. Pour into a bowl or pitcher, thin out as desired with water, cover and chill for several hours.
4. Meanwhile, prepare the garnishes, if using. Place them in small bowls on a platter. Serve the soup in glasses if it’s a very hot day and you aren’t serving garnishes (I like to serve it this way with drinks, before we sit down to dinner). Otherwise, serve it in bowls and pass the tray of garnishes.
 
Advance preparation:
This will keep for a day or two in the refrigerator.


​Black Bean Chili
This is a medium-hot vegetarian chili. Make it hotter if you prefer 3-alarm, by using hot ground chili or adding more medium chili.
 
1 recipe simmered black beans (use this recipe, substituting black beans for the pintos)
2 tablespoons canola or grapeseed oil
1 onion, finely chopped
4 large garlic cloves, minced
3 tablespoons mild ground chili (or use hot, or use more)
1 tablespoon lightly toasted cumin seeds, ground
1 28-ounce can chopped tomatoes
2 tablespoons tomato paste dissolved in 1 cup water
1 teaspoon dried oregano, preferably Mexican oregano
Salt, preferably kosher salt, to taste
1/2 cup chopped cilantro
4 ounces goat cheese or queso fresco (also known as queso ranchero), crumbled
 
1. Make the black beans as directed, preferably the day before you wish to serve.
2. Heat the oil in a medium nonstick skillet over medium heat and add the onion. Cook, stirring often, until the onion is lightly colored, about 10 minutes. Stir in the garlic, stir together for about a minute, until fragrant, and add the ground chili and cumin. Cook, stirring, for 2 to 3 minutes, until the mixture begins to stick to the pan. Add the tomatoes and oregano, and salt to taste. Bring to a simmer and cook, stirring often, until the tomatoes have cooked down and the mixture is beginning to stick to the pan, about 10 minutes. Stir in the tomato paste dissolved in water and the chipotles and bring back to a simmer. Season with salt to taste and simmer, stirring often, for 15 minutes, until the mixture is thick and fragrant.
3. Stir the tomato mixture into the beans and bring to a simmer. Simmer, stirring often and scraping the bottom of the pot, for 30 to 45 minutes. Taste and adjust salt.
4. Just before serving, stir in the cilantro. Spoon into bowls and garnish each bowl with a generous spoonful of goat cheese or queso fresco. Serve with corn tortillas or cornbread.
 
Yield: Serves 6 to 8
Advance preparation: The simmered beans can be made 3 or 4 days ahead and the chili will keep for 3 or 4 days in the refrigerator. This freezes well.

​

Picture
2 Comments

In My Kitchen: The Pantry Blog

6/12/2017

0 Comments

 
GRITS, GREENS, AND EGGS
Picture

​Grits, Greens, and Eggs
I’ve had some Anson Mills Pencil Cob Grits in my freezer for almost a year, and that’s too long. I like to buy grits from this wonderful mill every year, because all of the products from Anson are so fresh, and each harvest should be savored.
I serve the grits with eggs always, sunny side up or easy over. There is nothing like that luxurious taste of egg yolk oozing into creamy grits, especially if the grits are from Anson Mills and the eggs are a gift from my friend John Lyons’ hens. If I want to do something more elaborate for breakfast or for brunch I’ll usually make huevos rancheros over grits, with the grits standing in for corn tortillas.
Lately I’ve been eating my grits at dinner, and most often I serve them with seasoned blanched greens and eggs. I make the greens as a matter of course every week, with a generous bunch of red swiss chard or beet greens that I bring home from my farmers market. Those greens are great to have on hand as a side dish or an accompaniment to pasta, grits or polenta, or as the main ingredient in a gratin. The instructions for cooking the grits are courtesy of Kate Rentschler, creative director of Anson Mills.
​
 
Grits with Greens and Eggs
Yield: Serves 4

1 cup Anson Mills Colonial Coarse Pencil Cob Grits
1 1/4 to 1 1/2 pounds Swiss chard (or 1 pound other greens such as turnip greens, beet greens or kale)
Salt
2 tablespoons plus 2 teaspoons extra virgin olive oil
2 garlic cloves, minced (1 if cloves are very large)
1/4 to 1/2 teaspoon red pepper flakes (to taste, optional)
1 teaspoon chopped fresh thyme
1 teaspoon chopped fresh rosemary
Freshly ground pepper
2 tablespoons unsalted butter
4 eggs (or 8, if desired)
Optional: Parmesan, salsa or hot sauce for serving
 
1. Place grits in a heavy, medium saucepan (Renschler recommends a type called a Windsor saucepan; I used a Le Creuset). Add 2 cups spring or filtered water and stir once. Allow grits to settle a full minute, then tilt the pan and, using a fine tea strainer or fine skimmer, skim off and discard chaff and hulls. Cover and allow the grits to soak overnight at room temperature. If your kitchen is very warm, place in refrigerator.

2. Bring a large pot of water to a boil. Meanwhile, stem the greens and wash the leaves in 2 changes of water. If using chard, finely dice the stems and set aside. Fill a bowl with cold water or ice water.

3. When the water in the pot comes to a boil add enough salt to make it taste like the ocean, and add the greens. Blanch for about 1 minute, just until tender (2 minutes for kale). Using a slotted spoon, a spider or a Chinese skimmer (my favorite), scoop the greens out of the water and transfer to the bowl of cold water.

4. Drain greens. Take up handfuls and squeeze hard to get rid of excess water. When I am storing the blanched greens in the refrigerator, I squeeze the water out by the handful, then put all the little balls of greens into a bowl (cover and chill if not using right away). Cut strips in one direction across the squeezed ball of greens, then turn the ribbons a quarter turn and cut in strips again. Then you can chop them more finely if you wish by rocking your knife up and down over the pile of greens.

5. Heat 2 tablespoons olive oil over medium heat in a heavy, large skillet and add minced stems. Cook, stirring, until tender, about 5 minutes, and add minced garlic. Cook until the garlic begins to sizzle and smell fragrant, about 30 seconds. Add pepperoncini, thyme and rosemary, stir together for a few seconds, then add greens and stir and toss in the pan for about a minute, until greens are nicely infused with the oil, garlic and herbs. Season to taste with salt and pepper. Remove from the heat but keep warm.

6. To cook the grits, heat 2 cups water in a small saucepan to a bare simmer and keep hot (you can also use an electric kettle). Set saucepan with grits over medium heat. Bring to a simmer, stirring constantly with a wooden spoon, until the first starch takes hold (this means that the mixture will begin to thicken and you will no longer have to stir constantly). Reduce heat to the lowest possible setting. The grits should not be bubbling, they should be sighing, or breathing like somebody in a deep, comfortable sleep, rising up lazily in one big bubble, then falling as the bubble bursts. Watch carefully and each time they are thick enough to hold a spoon upright, stir in about 1/4 cup of the hot water. Stir in the salt after the first 10 minutes of gentle cooking. It should take about 25 minutes for the grits to be tender and creamy and by this time you should have added 3/4 to 1 cup water (perhaps a little more) in 3 or 4 additions.

7. When the grits are done – tender, creamy but not mushy, and able to hold their shape on a spoon – stir in the butter vigorously, add pepper, taste (carefully – don’t burn your tongue after all that care) and adjust salt.

8. Fry the eggs sunny side up or however you like them in the remaining 2 teaspoons olive oil. Spoon grits onto plates, top with greens and top the greens with an egg (or two). If desired, sprinkle on some Parmesan or spoon or drizzle on some salsa or hot sauce.

Picture
0 Comments

In My Kitchen: The Pantry Blog

5/26/2017

0 Comments

 
​Between my pantry and Robert’s we must have five pounds of lentils -- black lentils and green, brown lentils and red. I can’t tell you how such a collection accumulated, but this is not an ingredient I mind having on hand.
I decided to work through the black lentils first. They’re called Beluga lentils because they are small, almost round, and shiny, like black caviar. But they taste, deliciously, like lentils. Because they have a firm texture, they lend themselves to salads.
I could taste my beluga lentil salad before I put it together. There would be cumin in the vinaigrette and the defining herb would be mint. I’d roasted a red pepper a few days earlier and it was still in the refrigerator. It was definitely going in. I’m not a big raw onion fan, but if you are, add some chopped red onion to the mix. I added a can of tuna, crumbled some feta over the top, and we made a meal of it.
 
Beluga Lentil and Tuna Salad
Yield: Serves 4
 
1 heaped cup / 200 g beluga lentils
1 medium sweet red onion, cut in half, plus (optional) 1 small sweet red onion, finely chopped
2 plump garlic cloves, crushed or coarsely chopped
1 bay leaf
Salt (about 1 teaspoon)
1 red pepper, roasted, peeled, seeded and diced
1 can olive oil-packed or water-packed tuna, drained
2 tablespoons chopped or slivered fresh mint (I used spearmint)
1 tablespoon chopped chives
Freshly ground pepper to taste
 
For the dressing:
2 tablespoons sherry vinegar or red wine vinegar (more to taste)
Salt to taste
1/2 to 1 teaspoon Dijon mustard, to taste
1 small garlic clove, minced or pureed
1/2 teaspoon ground cumin (more to taste)
1/3 cup extra virgin olive oil
2 tablespoons broth from the lentils (more to taste)
 
For garnish:
1 romaine heart, broken into small pieces
About 1/4 cup / 30 grams feta, crumbled
Sliced cucumber
 
1. Place the lentils in a strainer and pick over for stones. Rinse well and place in a 2- or 3-quart saucepan. Add 1 quart / 1 liter water, the halved onion, the crushed or chopped garlic cloves, and the bay leaf. Bring to a boil over medium-high heat, then reduce the heat to low, cover and simmer 15 minutes. Add salt (about 1 teaspoon) and continue to simmer until the lentils are tender but intact, another 15 to 25 minutes. Taste and adjust seasoning. Allow to cool in the pot if you have the time, then using tongs, remove and discard the bay leaf, the onion halves and the garlic.
2. If using minced onion in the salad, place it in a bowl and cover with cold water. Let sit for 5-10 minutes, then drain and rinse.
3. Set a strainer over a bowl and drain the lentils. Place the lentils in a salad bowl and toss with the roasted red pepper, the rinsed onion if using, the tuna, mint, chives and pepper.
4. In a small bowl or liquid measuring cup, whisk together the vinegar, salt, mustard, garlic, cumin, olive oil and broth from the lentils. Toss all but 1 tablespoon with the lentil mixture. If desired, add a little more broth to the salad. Taste and adjust salt and pepper.  Toss the remaining tablespoon of dressing with the lettuce. Line plates of a platter with the lettuce, top with the salad, sprinkle with feta, garnish with sliced cucumber, and serve.
Picture
0 Comments

In My Kitchen: The Pantry Blog

5/16/2017

0 Comments

 
​I’m back! I’ve been going through the pantry, taking stock of the staples that have been sitting around for too long and are begging to find a place at the center of my plate. I just found a bag of einkorn, a soft wheat berry called petit épeautre in France,  that I bought last summer in Provence. Better use it up because I’m going back to Provence next month and will no doubt buy some more! I’ve made a couple of risotto-like dishes with it, one with mushrooms and one with asparagus and fava beans. It’s easier to make this kind of dish with einkorn than with rice because you don’t have to stir it. You won’t get the creamy quality of a real risotto, but you will get a dish with sensational texture and depth of flavor. The einkorn is soft enough to absorb the flavors of whatever broth you are cooking it in. Here it’s the intense broth obtained by soaking dried porcini mushrooms.
Einkorn “Risotto” with Mushrooms
Serves 4
1 cup / 200 g whole einkorn
About 1/2 cup / 20 g dried porcini mushrooms
2 tablespoons extra virgin olive oil
1 large shallot, finely minced
2 plump garlic cloves, minced
1 teaspoon fresh thyme leaves
1/2 pound / 250 g cremini mushrooms, trimmed and sliced
1/4 cup dry white or rosé wine
Salt to taste (about 3/4 teaspoon or more)
Freshly ground pepper
2 to 3 tablespoons minced Italian parsley
1/3 cup freshly grated Parmesan
 
1. Rinse the einkorn and place in a bowl.  Bring 3 cups water or stock (chicken or vegetable) to a boil and pour over the einkorn. Leave to soak for 1 hour.

2. While the einkorn is soaking, bring 2 cups water to a boil, place the dried porcini in a bowl or a Pyrex measuring cup and cover with the water. Let soak 30 minutes. Line a strainer with cheesecloth and place over a bowl. Drain the mushrooms and squeeze out liquid. Rinse in a couple of changes of water and squeeze again. Chop coarsely and set aside.

3. Heat the oil over medium heat in a heavy straight-sided skillet or a wide saucepan and add the shallot. Cook, stirring, until tender, about 3 minutes, and add the garlic and thyme. Cook, stirring, for about 30 seconds, just until fragrant, and stir in the sliced cremini mushrooms and the chopped reconstituted porcinis. Cook, stirring often, until the fresh mushrooms have begun to sweat and soften, 3 to 5 minutes.  Add the wine and cook, stirring, until the wine has evaporated. Season to taste with salt and pepper.

​4. Add the mushroom soaking liquid and the einkorn with its soaking liquid. Add salt to taste and bring to a boil. Reduce the heat and simmer gently, uncovered, stirring from time to time, until the einkorn is tender and most, but not all, of the liquid has evaporated, about 45 minutes. Taste and adjust seasonings. Stir in the parsley and if desired, stir in some of the Parmesan (pass the rest for sprinkling). Serve in wide bowls or on plates.
 

Picture
0 Comments

In My Kitchen: GF Tuscan Treats

1/22/2016

297 Comments

 
Time has gotten away from me over the last few months and I have a lot of catching up to do on this blog. I traveled a lot last fall – to Tuscany and France, to Boston and the Berkshires, New York and Jamaica – and I’m just now getting around to filing my photos and telling you about what I’ve done. 
In early October I spent a week in Tuscany, cooking amazing gluten free dishes with the inimitable Carla Bartolucci, owner of Jovial Foods, at her Gluten Free Culinary Getaway near Lucca. I made pasta and pizza, savory dumplings and sweet cakes, pies, and cookies using Carla’s formulas and her gluten free rice flour, which will be coming to market very soon. Carla taught me a few new pasta sauces, my favorite being a broccoli and anchovy sauce that I featured a few weeks ago on Recipes for Health. 
​
Although I have no problem with gluten, most of the other people at Carla’s culinary getaway do, and for them it was such a gift to be able to spend a week in Italy and not have to worry about finding enough to eat; the kitchen at the villa was a gluten free kitchen, and Italians in general are gluten-aware, with gluten-free choices on their menus.

Picture
Carla supervises as I mix up the dough.
Picture
Rolling out gluten free pasta dough.
Picture
Here are the gnuddi (dumplings, made with spinach, ricotta and gf flour), ready to cook in boiling water.
297 Comments

In My Kitchen: It’s Still Summer At The Farmers Market

9/23/2015

2 Comments

 
My calendar says that autumn begins this Wednesday, September 23rd but my farmers markets tell me otherwise. Local eggplants, peppers, and the last of the summer’s tomatoes, produce we food writers wax on about during the summer months, will be around well into October. I’ve been looking back at some of my favorite dishes from Recipes for Health that showcase these ingredients. 

The first complex vegetable dish that I learned to make was ratatouille, the quintessential slow-cooked summer vegetable ragout made with eggplant, summer squash, onions, peppers, garlic and tomatoes from the South of France. I knew I loved cooking when I made it. It takes a little time and attention, but the transformation of these vegetables into a savory stew that tastes even better the day after you make it is so worth the effort. You can turn ratatouille into dinner by making it the focus of a grain-based big bowl. I use farro in this one but any grain will do.

Picture
Ratatouille isn’t the only Mediterranean summer stew. Travel around the region and you will find similar heady eggplant/tomato/squash/ medleys everywhere you go, each with a signature set of seasonings or techniques that make it identifiable as Greek, Turkish, Spanish, Italian. Italy’s caponata is a sweet and sour affair that is usually served cold or at room temperature. In Greece I learned to make briam, a layered medley of summer vegetables that also included potatoes and green beans. One of my favorite ratatouille-like dishes is Turkish turlü, a nuanced sweet and sour stew spiced with coriander seeds, cinnamon, fenugreek and paprika. I also love the rich Spanish mixture called samfaina, which is cooked for so long that it is almost like a confit.

I also love to use these vegetables for hearty deep-dish pies and quiches, or for simpler focaccia and pizza. One of my favorite homes for eggplant and peppers is this spicy baked Tunisian frittata, seasoned with harissa, cinnamon and cayenne. Serve it warm or cold; leftovers pack up well for lunch. A similar dish, a bit heartier, is this cumin-scented eggplant and red pepper gratin.

The Mediterranean isn’t the only place to look for eggplant recipes, of course. I see so many varieties of eggplant at my Asian markets and the Asian stalls at my farmers market. I use the eggplant in spicy grilled eggplant salads and in colorful stir-fries that might also include tofu and a rainbow of sweet and hot peppers.

The kids might be back in school and in every other way summer is definitely over. But it needn’t be, just yet, in your kitchen.
2 Comments

Labor Day Craftsy Sale!

9/5/2015

0 Comments

 
Picture
0 Comments
<<Previous
Forward>>
    Picture

    Martha Rose Shulman

    Welcome to my blog, where I’ll keep you up to date on what I’ve been up to in my kitchen as I test recipes for my Recipes for Health feature on the New York Times; what I’ll be up to with my online classes at Craftsy and my actual classes at other cooking schools; my new books and latest publications; and any other upcoming appearances and events.

    My food is all about fresh, seasonal, and organic ingredients. 

    My recipes are all about empowering you to eat well. 

     Classes

    Big Bowls: Hearty Vegetarian Meals 
    (Online Class)
    A healthy, flavorful how-to!

      Receive Martha's monthly updates!

    Submit

    Archives

    August 2020
    May 2020
    April 2020
    March 2020
    October 2019
    November 2017
    September 2017
    June 2017
    May 2017
    January 2016
    September 2015
    August 2015
    July 2015
    June 2015
    May 2015
    March 2015
    February 2015
    January 2015
    December 2014
    November 2014
    October 2014
    September 2014
    August 2014
    June 2014
    May 2014
    April 2014

    Categories

    All
    BOOKS

    RSS Feed

Powered by Create your own unique website with customizable templates.