It’s been a while since I’ve posted and I apologize. This is mainly due to the fact that I tend to start preparing dinner on the late side, which means I don’t have good light for photographs by the time dinner is ready. Sometimes I can make a photograph the next day, but not always as we tend to finish up the food, or if we don’t, it never looks as photogenic the next day. In any case I never get to it to take a picture before Bob gobbles it up for lunch.
It certainly doesn’t mean that we haven’t been eating well! I’ve been keeping a running journal of my dinners, and here’s a random 10-day sample of menus from the last week of July, first week of August:
August 7
Pasta with cast iron skillet-seared cherry tomatoes
Salad
August 6
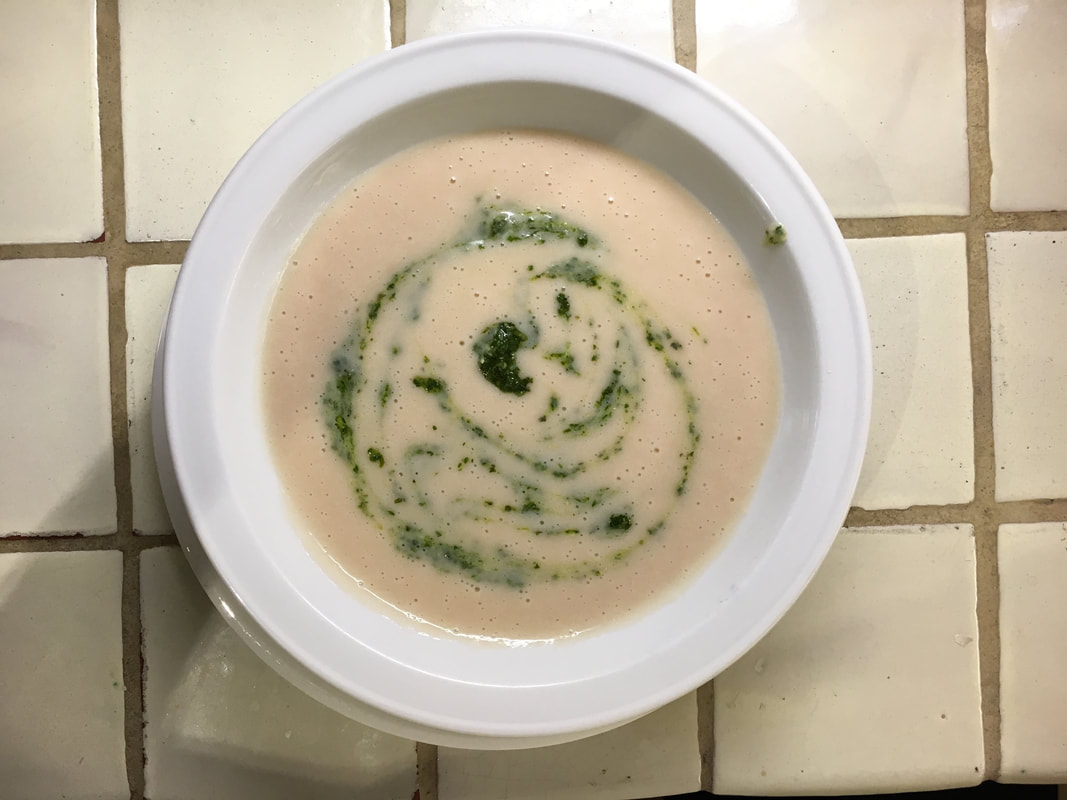
Gazpacho
Salad of black rice, lima beans, radishes, parsley, lettuce, mushrooms
August 5
Black and Carnaroli rice risotto with lots of celery, red onion, some peas and pesto
Tomato and lettuce salad
August 4
White lima bean and tuna salad
August 3
Large white lima beans with pesto (ummmmm!)
Leftover flank steak
Salad (lettuce, radicchio, mushrooms, yellow cherry tomatoes, tarragon, egg, toasted baguette crusts rubbed with garlic)
August 2
Gazpacho
Soft tacos with Chayote with Chile de Arbol, Tomatoes and Cotija
August 1
(Outdoor distanced dinner with Cliff Wright! First guest since March)
Grilled flank steak (marinated with a mix of onion, garlic, lime juice, cumin, chile powder, salt, pepper, oregano, olive oil)
Grilled corn on the cob
Pati Jinich’s Chayote with Chile de Arbol, Tomatoes and Cotija
Corn Tortillas
Simmered white Limas
Pati Jinich’s Chocolate Pecan Cake
July 31
Rigatoni with White Beans, Peas and Pesto
Salad
July 30, 2020
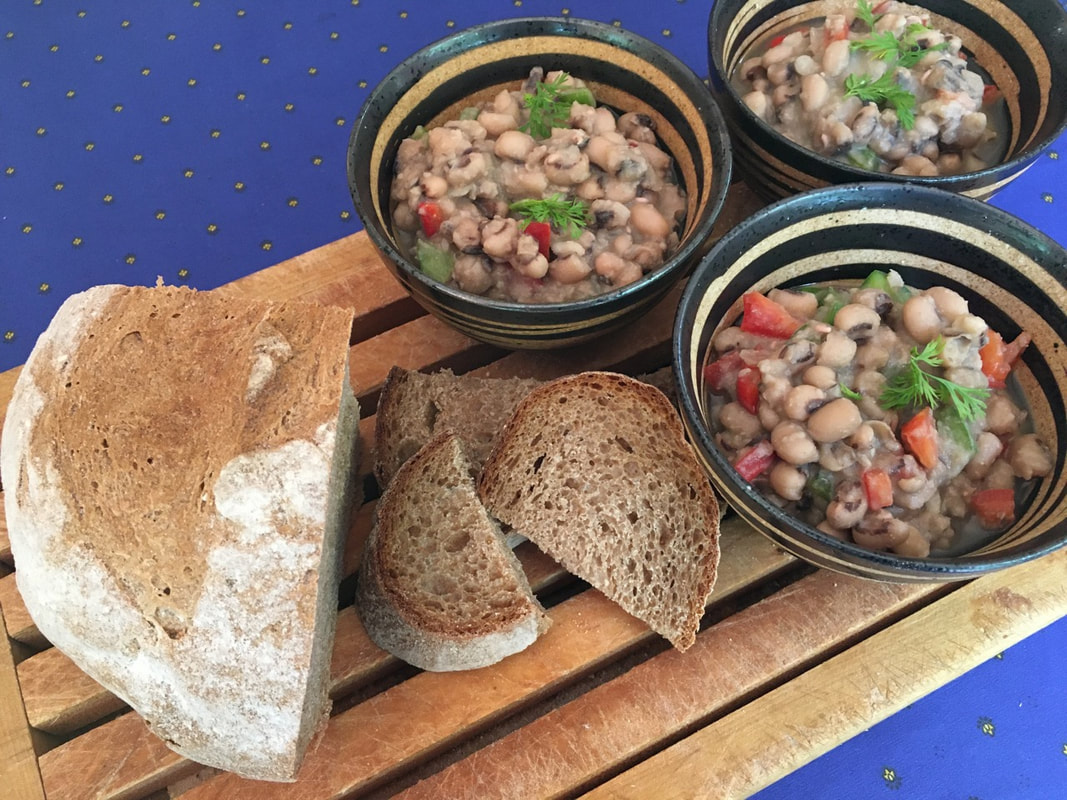
Beans on Toast
Salsa
Corn on the Cob (with pesto)
Tomato and Cucumber Salad
July 29, 2020
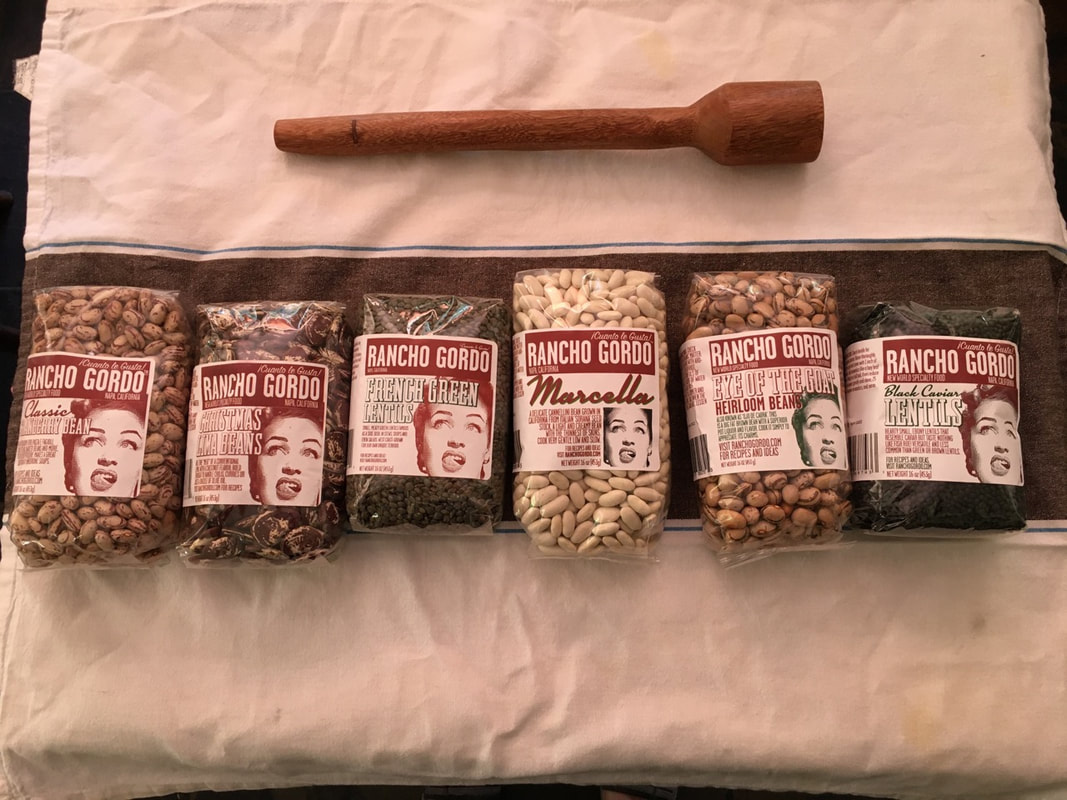
Eye of the Goat Beans from Rancho Gordo
Salsa Fresca
Flour tortillas
Salad
July 28
Gruyère Omelet
Lemony Bulgur and Lettuce Salad with cucumber, tomato, parsley
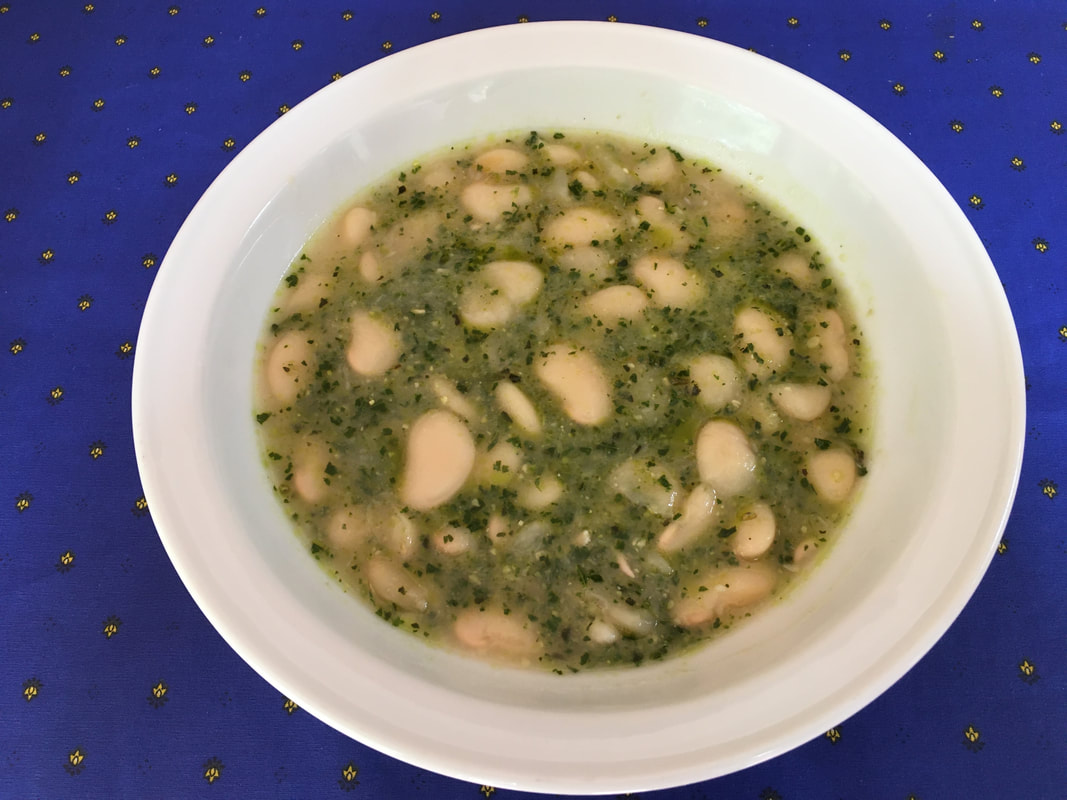
You can see from this list of meals that I’ve been making a lot of pesto (and a lot of beans). I get a big bunch of basil every week or two at the farmers market (really from the farmers market, as I am now having a box delivered every Sunday. I’m still sheltering in place for the most part). So about once every two weeks I make my standard pesto. Bob and I usually get two or three meals out of it. One of our favorites – and it’s so simple – is a bowl of pillowy white lima beans in their broth, with a spoonful of pesto stirred in and a bit of Parmesan sprinkled on top. It’s beautiful and so incredibly delicious.
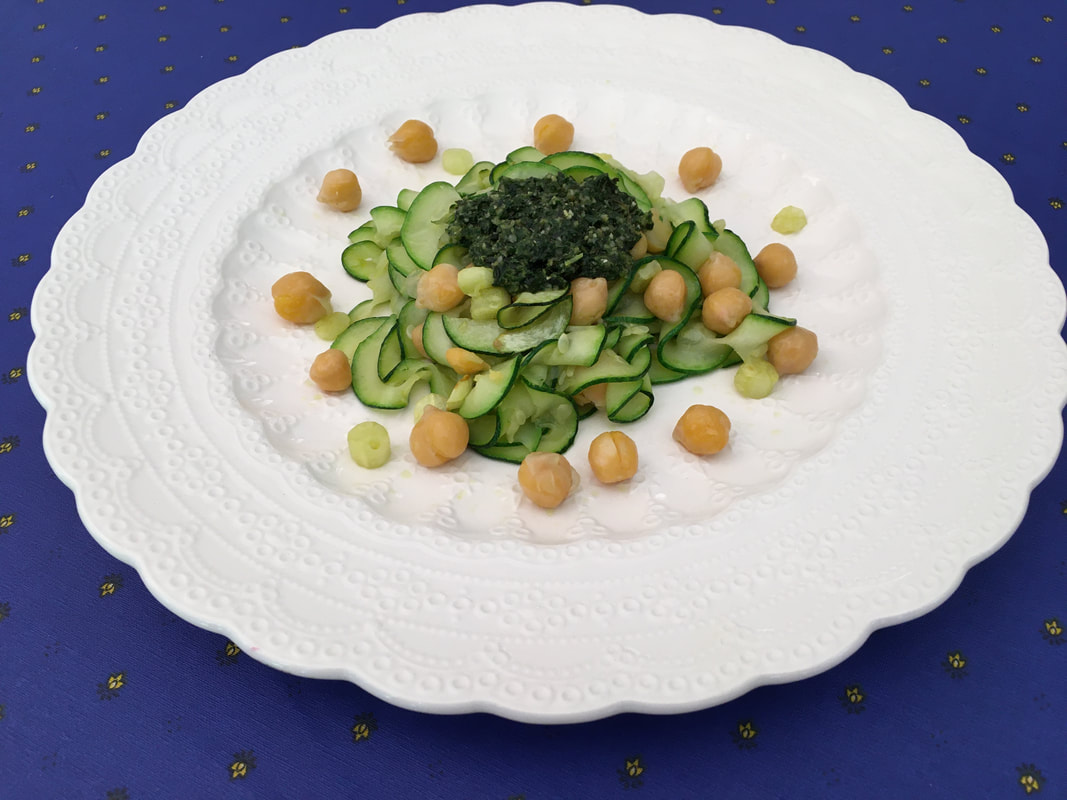
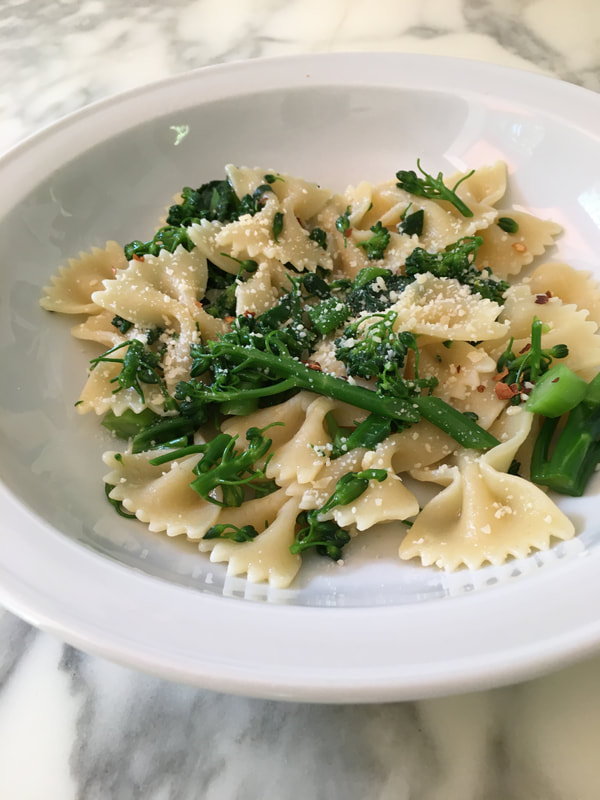
A few years ago I wrote a book of spiralizer recipes called Spiralize This! I love the way spiralized zucchini cooks up in a matter of minutes, to be tossed with whatever you love to toss pasta with. I enjoy its slippery texture (you have to be careful not to overcook it) and lightness. Last night I pulled out my spiralizer and cooked up zucchini from the farmers market. I added cooked chickpeas to the pan and tossed everything with the pesto I’d just made. So fabulous I had to make it again at noon today so I could photograph it for you.
My Pesto
When I make pesto, in order to preserve the nice color of the basil, I blanch the leaves for just a few seconds. Some readers have commented that this leaches out flavor. But I am only talking a few seconds here, no more than 5. The pesto is delicious, and it remains bright. I like to use a mini food processor for this.
2 cups / about 1.5 ounces, tightly packed, fresh basil leaves
¼ teaspoon salt
2 tablespoons / 1 ounce pine nuts, lightly toasted if desired
1/3 cup extra virgin olive oil
2 garlic cloves, halved, green shoots removed
Freshly ground pepper
1/3 to 1/2 cup / 1.5 to 2 ounces freshly grated Parmesan
1. Bring a medium-size saucepan full of water to a boil. Fill a bowl with ice water and place it next to the saucepan with a skimmer close by (a Chinese skimmer is good for this). When the water comes to a boil salt generously and add the basil leaves. Push them down into the water with the back of a skimmer to submerge, and right away, take them out of the water and transfer to the ice water. Don’t leave more than 5 seconds. Drain and squeeze out excess water, then squeeze once more in a clean dish towel or cheesecloth.
2. In a mini food processor, combine the blanched basil and process until finely chopped. With the machine running, slowly add the olive oil and continue to process for a full minute, or until the mixture is reduced to a fine puree.
3. Pound the pine nuts in a mortar and pestle until becoming pasty. Add the garlic and salt and pound to a paste. Add to the basil, along with some freshly ground pepper, and process until well blended and the mixture is smooth. Add the Parmesan, process until thoroughly mixed in, and remove from the processor. You should have about 2/3 cup of pesto. Keep in a covered container in the refrigerator for up to 4 days.
Note: this freezes well. Make through step 2 and freeze. Continue with Step 3 after thawing.
Large White Lima Beans with Pesto
Serves 4 to 6
1 pound white lima beans, rinsed and picked over for stones, soaked for 4 to 6 hours if possible
1 white onion, cut in half horizontally, peeled
4 garlic cloves, smashed
1 bay leaf
2 to 2 ½ quarts water
Salt
4 to 6 tablespoons pesto
Freshly grated Parmesan for serving
1. Drain the soaked beans and place in a heavy pot with the onion, garlic, bay leaf and water. Bring to a gentle boil, cover and turn heat to low. Simmer 1 hour. Add salt to taste (2 to 3 teaspoons) and continue to simmer until the beans are pillowy-soft and the broth is fragrant, ½ to 1 hour. Taste and adjust salt. Remove bay leaf and onion halves.
2. Serve hot, spooning a generous tablespoon of pesto into each bowl. Pass some Parmesan at the table.
Spiralized Zucchini with Chickpeas and Pesto
Serves 4
1 pound zucchini, spiralized
1 tablespoon extra virgin olive oil
Salt to taste
¾ cup cooked chickpeas
4 heaped tablespoons pesto (more to taste)
Freshly grated Parmesan for serving
1. Cut the spiralized strands of zucchini into manageable lengths, about 8-10 inches. Warm the pesto in a microwave on 50% power for about 20-30 seconds.
2. Heat the olive oil in a large skillet over medium-high heat. Add the zucchini and cook, tossing in the pan, for about 3 minutes, just until it brightens in color, softens a little and begins to look translucent. Season to taste with salt. Add the chickpeas and pesto, toss together and serve.
It certainly doesn’t mean that we haven’t been eating well! I’ve been keeping a running journal of my dinners, and here’s a random 10-day sample of menus from the last week of July, first week of August:
August 7
Pasta with cast iron skillet-seared cherry tomatoes
Salad
August 6
Gazpacho
Salad of black rice, lima beans, radishes, parsley, lettuce, mushrooms
August 5
Black and Carnaroli rice risotto with lots of celery, red onion, some peas and pesto
Tomato and lettuce salad
August 4
White lima bean and tuna salad
August 3
Large white lima beans with pesto (ummmmm!)
Leftover flank steak
Salad (lettuce, radicchio, mushrooms, yellow cherry tomatoes, tarragon, egg, toasted baguette crusts rubbed with garlic)
August 2
Gazpacho
Soft tacos with Chayote with Chile de Arbol, Tomatoes and Cotija
August 1
(Outdoor distanced dinner with Cliff Wright! First guest since March)
Grilled flank steak (marinated with a mix of onion, garlic, lime juice, cumin, chile powder, salt, pepper, oregano, olive oil)
Grilled corn on the cob
Pati Jinich’s Chayote with Chile de Arbol, Tomatoes and Cotija
Corn Tortillas
Simmered white Limas
Pati Jinich’s Chocolate Pecan Cake
July 31
Rigatoni with White Beans, Peas and Pesto
Salad
July 30, 2020
Beans on Toast
Salsa
Corn on the Cob (with pesto)
Tomato and Cucumber Salad
July 29, 2020
Eye of the Goat Beans from Rancho Gordo
Salsa Fresca
Flour tortillas
Salad
July 28
Gruyère Omelet
Lemony Bulgur and Lettuce Salad with cucumber, tomato, parsley
You can see from this list of meals that I’ve been making a lot of pesto (and a lot of beans). I get a big bunch of basil every week or two at the farmers market (really from the farmers market, as I am now having a box delivered every Sunday. I’m still sheltering in place for the most part). So about once every two weeks I make my standard pesto. Bob and I usually get two or three meals out of it. One of our favorites – and it’s so simple – is a bowl of pillowy white lima beans in their broth, with a spoonful of pesto stirred in and a bit of Parmesan sprinkled on top. It’s beautiful and so incredibly delicious.
A few years ago I wrote a book of spiralizer recipes called Spiralize This! I love the way spiralized zucchini cooks up in a matter of minutes, to be tossed with whatever you love to toss pasta with. I enjoy its slippery texture (you have to be careful not to overcook it) and lightness. Last night I pulled out my spiralizer and cooked up zucchini from the farmers market. I added cooked chickpeas to the pan and tossed everything with the pesto I’d just made. So fabulous I had to make it again at noon today so I could photograph it for you.
My Pesto
When I make pesto, in order to preserve the nice color of the basil, I blanch the leaves for just a few seconds. Some readers have commented that this leaches out flavor. But I am only talking a few seconds here, no more than 5. The pesto is delicious, and it remains bright. I like to use a mini food processor for this.
2 cups / about 1.5 ounces, tightly packed, fresh basil leaves
¼ teaspoon salt
2 tablespoons / 1 ounce pine nuts, lightly toasted if desired
1/3 cup extra virgin olive oil
2 garlic cloves, halved, green shoots removed
Freshly ground pepper
1/3 to 1/2 cup / 1.5 to 2 ounces freshly grated Parmesan
1. Bring a medium-size saucepan full of water to a boil. Fill a bowl with ice water and place it next to the saucepan with a skimmer close by (a Chinese skimmer is good for this). When the water comes to a boil salt generously and add the basil leaves. Push them down into the water with the back of a skimmer to submerge, and right away, take them out of the water and transfer to the ice water. Don’t leave more than 5 seconds. Drain and squeeze out excess water, then squeeze once more in a clean dish towel or cheesecloth.
2. In a mini food processor, combine the blanched basil and process until finely chopped. With the machine running, slowly add the olive oil and continue to process for a full minute, or until the mixture is reduced to a fine puree.
3. Pound the pine nuts in a mortar and pestle until becoming pasty. Add the garlic and salt and pound to a paste. Add to the basil, along with some freshly ground pepper, and process until well blended and the mixture is smooth. Add the Parmesan, process until thoroughly mixed in, and remove from the processor. You should have about 2/3 cup of pesto. Keep in a covered container in the refrigerator for up to 4 days.
Note: this freezes well. Make through step 2 and freeze. Continue with Step 3 after thawing.
Large White Lima Beans with Pesto
Serves 4 to 6
1 pound white lima beans, rinsed and picked over for stones, soaked for 4 to 6 hours if possible
1 white onion, cut in half horizontally, peeled
4 garlic cloves, smashed
1 bay leaf
2 to 2 ½ quarts water
Salt
4 to 6 tablespoons pesto
Freshly grated Parmesan for serving
1. Drain the soaked beans and place in a heavy pot with the onion, garlic, bay leaf and water. Bring to a gentle boil, cover and turn heat to low. Simmer 1 hour. Add salt to taste (2 to 3 teaspoons) and continue to simmer until the beans are pillowy-soft and the broth is fragrant, ½ to 1 hour. Taste and adjust salt. Remove bay leaf and onion halves.
2. Serve hot, spooning a generous tablespoon of pesto into each bowl. Pass some Parmesan at the table.
Spiralized Zucchini with Chickpeas and Pesto
Serves 4
1 pound zucchini, spiralized
1 tablespoon extra virgin olive oil
Salt to taste
¾ cup cooked chickpeas
4 heaped tablespoons pesto (more to taste)
Freshly grated Parmesan for serving
1. Cut the spiralized strands of zucchini into manageable lengths, about 8-10 inches. Warm the pesto in a microwave on 50% power for about 20-30 seconds.
2. Heat the olive oil in a large skillet over medium-high heat. Add the zucchini and cook, tossing in the pan, for about 3 minutes, just until it brightens in color, softens a little and begins to look translucent. Season to taste with salt. Add the chickpeas and pesto, toss together and serve.


 RSS Feed
