My friend Angie came over again last Saturday with more bounty from her garden. Lots of chard again – I can never have too much of it and I’ve already blanched and frozen the greens, a good thing to do during this time of uncertainty. I’ll make another gratin with the stems as soon as I have enough milk for a béchamel – whenever my most recent Instacart order gets here. There were also lots of leeks, a gorgeous Chinese white radish with a terrific bunch of greens attached, and huge leaves of black kale, aka Tuscan kale, a dark green kale variety that has always been one of my favorites.
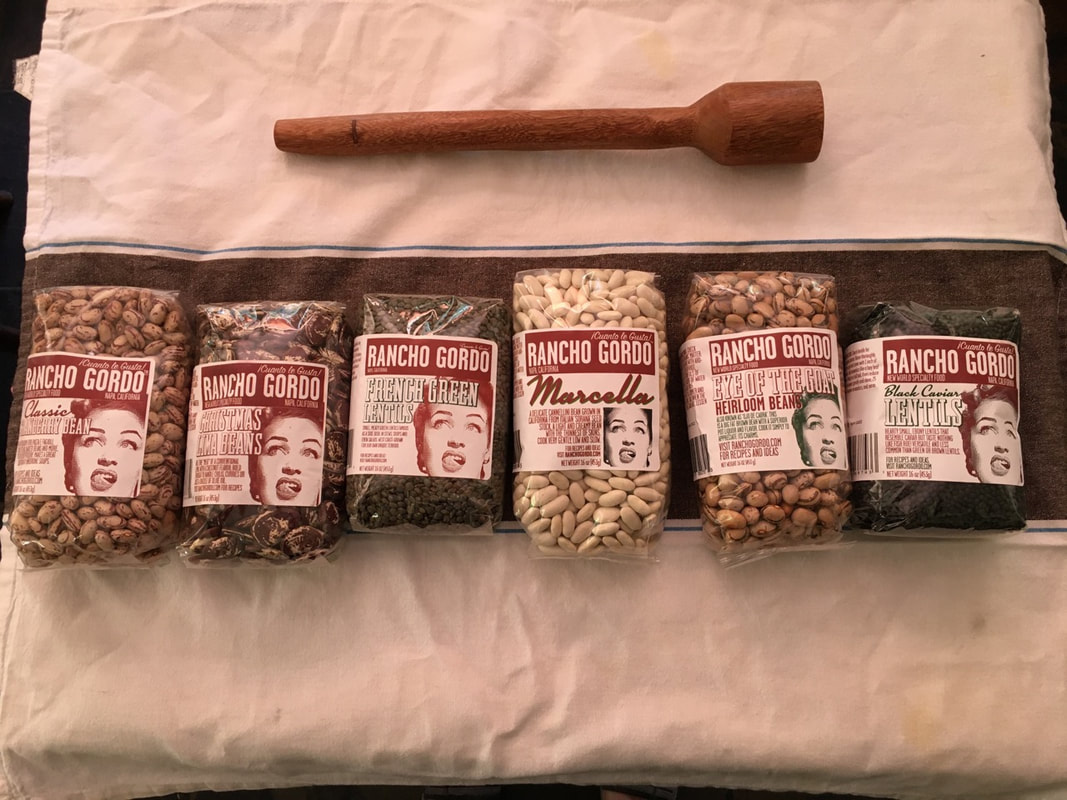
When Angie was at the house delivering her bounty I also got a delivery from Rancho Gordo, purveyor of luxurious heirloom beans. As soon as it became apparent in early March that we were going into lockdown I’d put in the order, and now, a month later, it was here. In March much of their inventory was already out of stock (more is now). But not black caviar lentils, tiny jewels that yield an inky broth with that inimitable lentil flavor. I just simmer the lentils with a halved onion, a couple of smashed garlic cloves, and always a bay leaf, lentils’ favorite herbal partner. They take 30-40 minutes to cook. I salt towards the end of cooking.
I put the lentils to good use with the greens. We had a simple grain bowl that night -- farro with black caviar lentils, blanched Chinese radish greens, steamed chard stems, sliced Chinese radish, and feta on top. Just typing this makes me want to make the exact same grain bowl again.
I’d cooked about a half pound of the black caviar lentils, and we had enough left over for Bob to have a small bowl for lunch the following day. That left a scant cup, and I stirred a small can of tuna into that and toasted thick slices of the mixed grains bread that I’ve been making, for the most fabulous beans on toast the following night. If you are vegetarian, leave out the tuna, those lentils are just wonderful on their own.
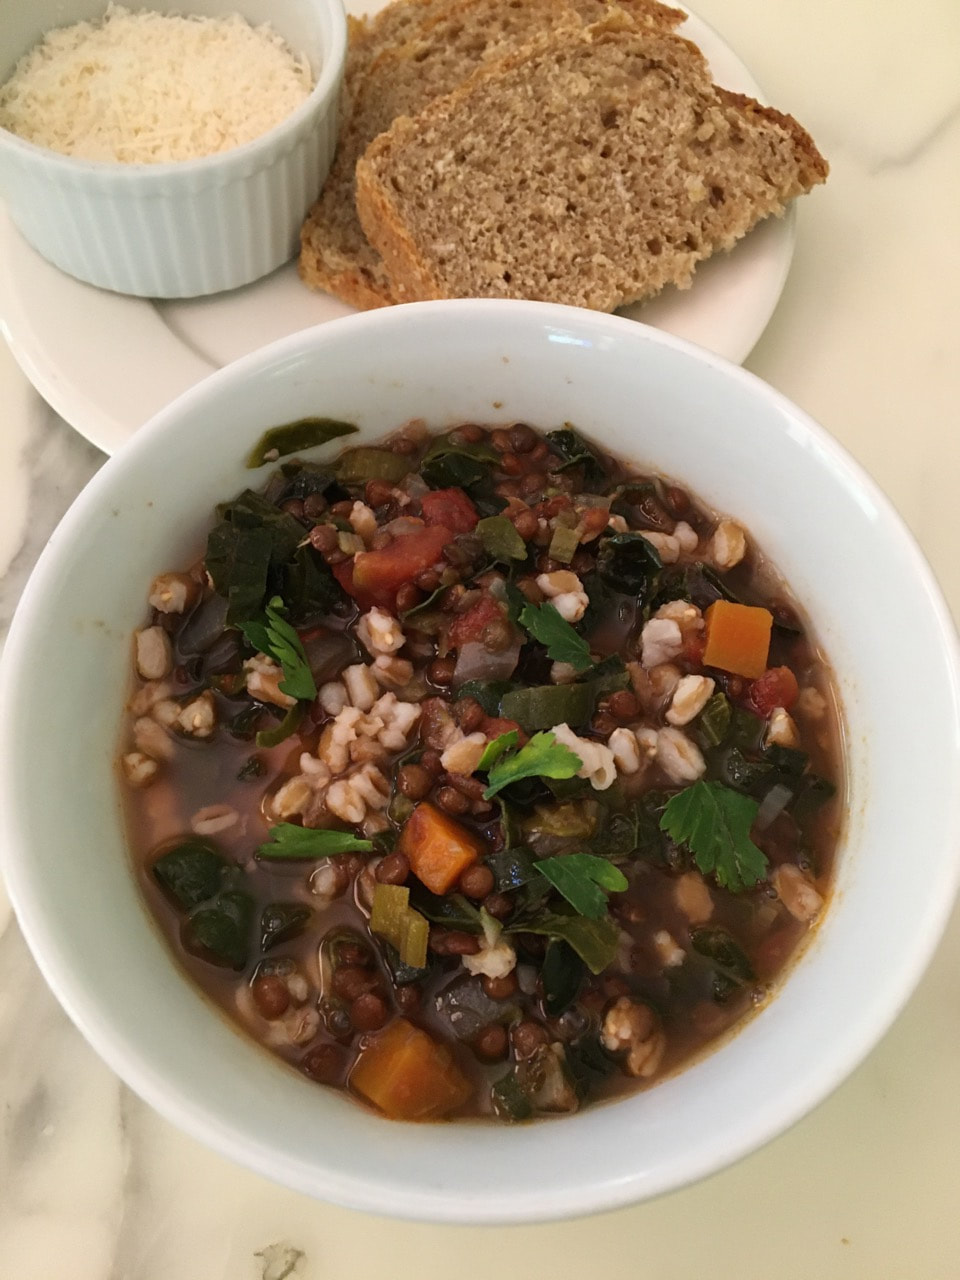
I’ve ordered more black lentils; they aren’t coming until the end of May. But I’m not hoarding what I have left. I knew that I wanted to pair them with that generous bunch of black kale that Angie gave me, and I didn’t have to think about how I’d do it. I’ve had a lentil and kale minestrone in my repertoire for many years, and it’s been a while since I’ve made it. The soup is made in much the same way as the cabbage minestrone I gave you in an earlier post, but the lentils contribute lots of substance, and an added depth of flavor. Don’t hesitate to make this with regular lentils. The results are equally satisfying.
Lentil Minestrone with Kale and Farro
Serves 6
2 tablespoons olive oil
1 onion, chopped
1 good size leek, white and light green part only, cut in half lengthwise, cleaned well, and thinly sliced (optional)
1 large or 2 small carrots, diced
2 to 4 garlic cloves, to taste, minced or pressed
1 14-ounce can chopped tomatoes, with juice
1/2 teaspoon dried thyme (1 teaspoon fresh leaves)
1/2 teaspoon oregano
3/4 cup / 6 ounces brown, green or black lentils (about 3/4 cup), picked over and rinsed
7 cups water
1 Parmesan rind
A few sprigs each parsley and thyme
1 bay leaf
Salt
3/4 pound kale, preferably black kale, stemmed, washed well in 2 rinses water
Freshly ground pepper to taste
1/2 cup farro, cooked (see variations below)
Chopped flat-leaf parsley for garnish
Freshly grated Parmesan
1. Heat the oil over medium heat in a heavy soup pot or Dutch oven, and add the onion, carrot, and leek. Add a pinch of salt. Cook, stirring, until the vegetables are tender, about 5 minutes or a little longer, and stir in the garlic. Cook, stirring, just until the garlic smells fragrant and translucent, about 1 minute, and stir in the tomatoes, thyme and oregano. Bring the tomatoes to a simmer. Cook, stirring often, for 5 to 10 minutes, until the tomatoes have cooked down somewhat and smell fragrant. Stir in the lentils and water and bring to a boil.
2. Tie the Parmesan rind, parsley and thyme sprigs and the bay leaf together with kitchen twine, or tie in a piece of cheesecloth. Add to the soup. Reduce the heat, cover and simmer 30 minutes (Meanwhile, cook the farro). Add salt, about 2 teaspoons to begin with (you will probably add more), and simmer another 15 minutes, until the lentils are tender and the broth fragrant.
3. Stack the kale leaves and cut crosswise into thin ribbons. Add to the soup and simmer 10 to 15 minutes, until the kale is tender. Stir in the farro and heat through. Add pepper to taste and adjust salt. Remove the Parmesan rind bundle. Stir in the parsley. Serve, topping each bowlful with a generous spoonful of Parmesan cheese.
Variations: If you want to add a little heat to this soup, add a pinch of cayenne along with the bouquet garni in step 2.
You can substitute Arborio rice or soup pasta, such as elbows, for the farro. Shortly before serving, add directly to the soup and simmer until rice is cooked through or pasta is cooked al dente,.
When Angie was at the house delivering her bounty I also got a delivery from Rancho Gordo, purveyor of luxurious heirloom beans. As soon as it became apparent in early March that we were going into lockdown I’d put in the order, and now, a month later, it was here. In March much of their inventory was already out of stock (more is now). But not black caviar lentils, tiny jewels that yield an inky broth with that inimitable lentil flavor. I just simmer the lentils with a halved onion, a couple of smashed garlic cloves, and always a bay leaf, lentils’ favorite herbal partner. They take 30-40 minutes to cook. I salt towards the end of cooking.
I put the lentils to good use with the greens. We had a simple grain bowl that night -- farro with black caviar lentils, blanched Chinese radish greens, steamed chard stems, sliced Chinese radish, and feta on top. Just typing this makes me want to make the exact same grain bowl again.
I’d cooked about a half pound of the black caviar lentils, and we had enough left over for Bob to have a small bowl for lunch the following day. That left a scant cup, and I stirred a small can of tuna into that and toasted thick slices of the mixed grains bread that I’ve been making, for the most fabulous beans on toast the following night. If you are vegetarian, leave out the tuna, those lentils are just wonderful on their own.
I’ve ordered more black lentils; they aren’t coming until the end of May. But I’m not hoarding what I have left. I knew that I wanted to pair them with that generous bunch of black kale that Angie gave me, and I didn’t have to think about how I’d do it. I’ve had a lentil and kale minestrone in my repertoire for many years, and it’s been a while since I’ve made it. The soup is made in much the same way as the cabbage minestrone I gave you in an earlier post, but the lentils contribute lots of substance, and an added depth of flavor. Don’t hesitate to make this with regular lentils. The results are equally satisfying.
Lentil Minestrone with Kale and Farro
Serves 6
2 tablespoons olive oil
1 onion, chopped
1 good size leek, white and light green part only, cut in half lengthwise, cleaned well, and thinly sliced (optional)
1 large or 2 small carrots, diced
2 to 4 garlic cloves, to taste, minced or pressed
1 14-ounce can chopped tomatoes, with juice
1/2 teaspoon dried thyme (1 teaspoon fresh leaves)
1/2 teaspoon oregano
3/4 cup / 6 ounces brown, green or black lentils (about 3/4 cup), picked over and rinsed
7 cups water
1 Parmesan rind
A few sprigs each parsley and thyme
1 bay leaf
Salt
3/4 pound kale, preferably black kale, stemmed, washed well in 2 rinses water
Freshly ground pepper to taste
1/2 cup farro, cooked (see variations below)
Chopped flat-leaf parsley for garnish
Freshly grated Parmesan
1. Heat the oil over medium heat in a heavy soup pot or Dutch oven, and add the onion, carrot, and leek. Add a pinch of salt. Cook, stirring, until the vegetables are tender, about 5 minutes or a little longer, and stir in the garlic. Cook, stirring, just until the garlic smells fragrant and translucent, about 1 minute, and stir in the tomatoes, thyme and oregano. Bring the tomatoes to a simmer. Cook, stirring often, for 5 to 10 minutes, until the tomatoes have cooked down somewhat and smell fragrant. Stir in the lentils and water and bring to a boil.
2. Tie the Parmesan rind, parsley and thyme sprigs and the bay leaf together with kitchen twine, or tie in a piece of cheesecloth. Add to the soup. Reduce the heat, cover and simmer 30 minutes (Meanwhile, cook the farro). Add salt, about 2 teaspoons to begin with (you will probably add more), and simmer another 15 minutes, until the lentils are tender and the broth fragrant.
3. Stack the kale leaves and cut crosswise into thin ribbons. Add to the soup and simmer 10 to 15 minutes, until the kale is tender. Stir in the farro and heat through. Add pepper to taste and adjust salt. Remove the Parmesan rind bundle. Stir in the parsley. Serve, topping each bowlful with a generous spoonful of Parmesan cheese.
Variations: If you want to add a little heat to this soup, add a pinch of cayenne along with the bouquet garni in step 2.
You can substitute Arborio rice or soup pasta, such as elbows, for the farro. Shortly before serving, add directly to the soup and simmer until rice is cooked through or pasta is cooked al dente,.


 RSS Feed
