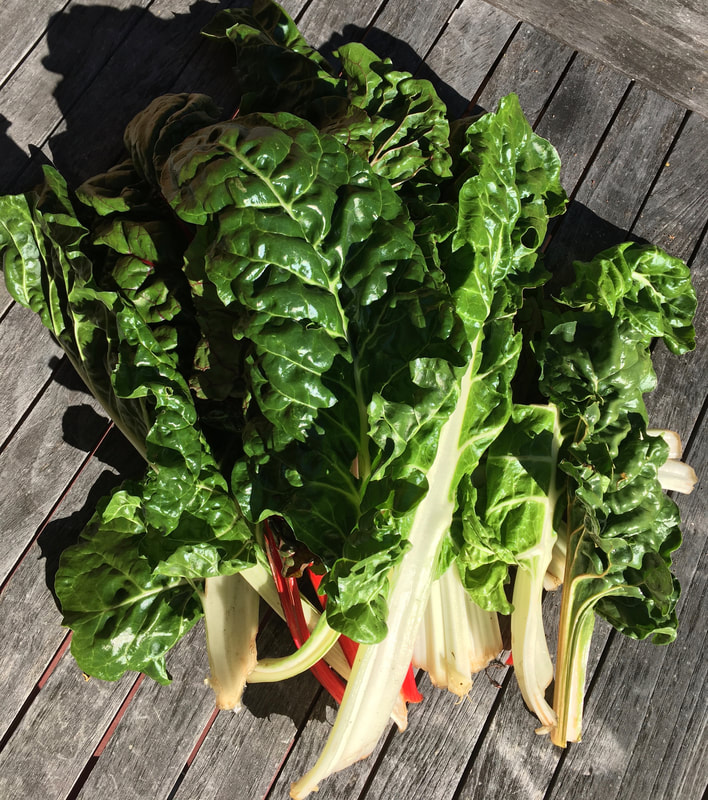
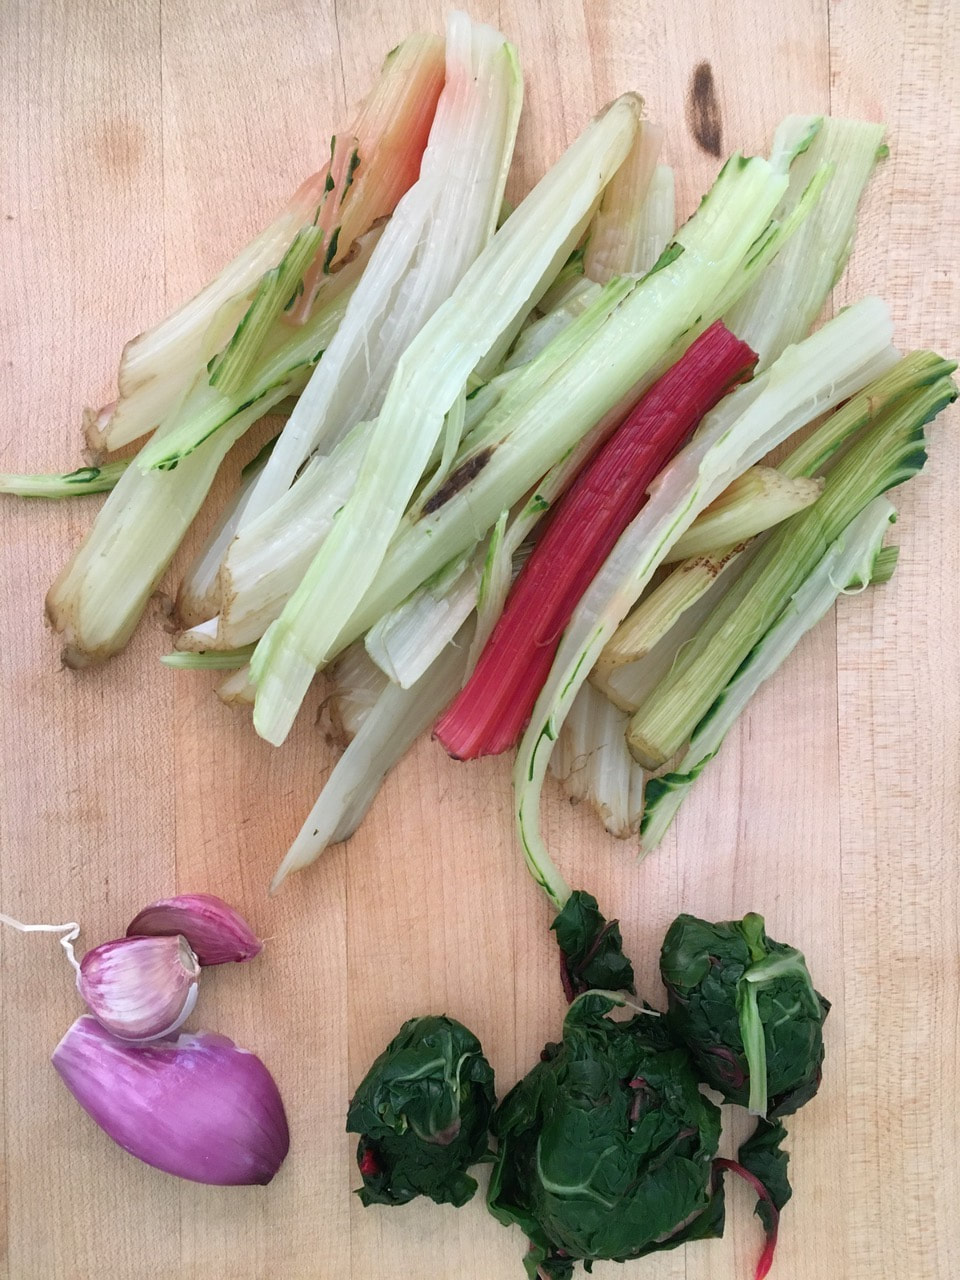
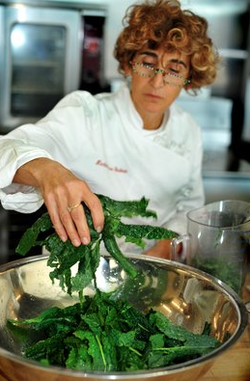
A week ago my friend Angie Mason, gardener and so many other things extraordinaire, brought me 2 pounds of chard from her garden. Already cleaned! Above and beyond, but that’s Angie. We sat in the sun at either end of our long outdoor table and visited. It was a delectable moment. We are all so starved for actual as opposed to virtual visits.
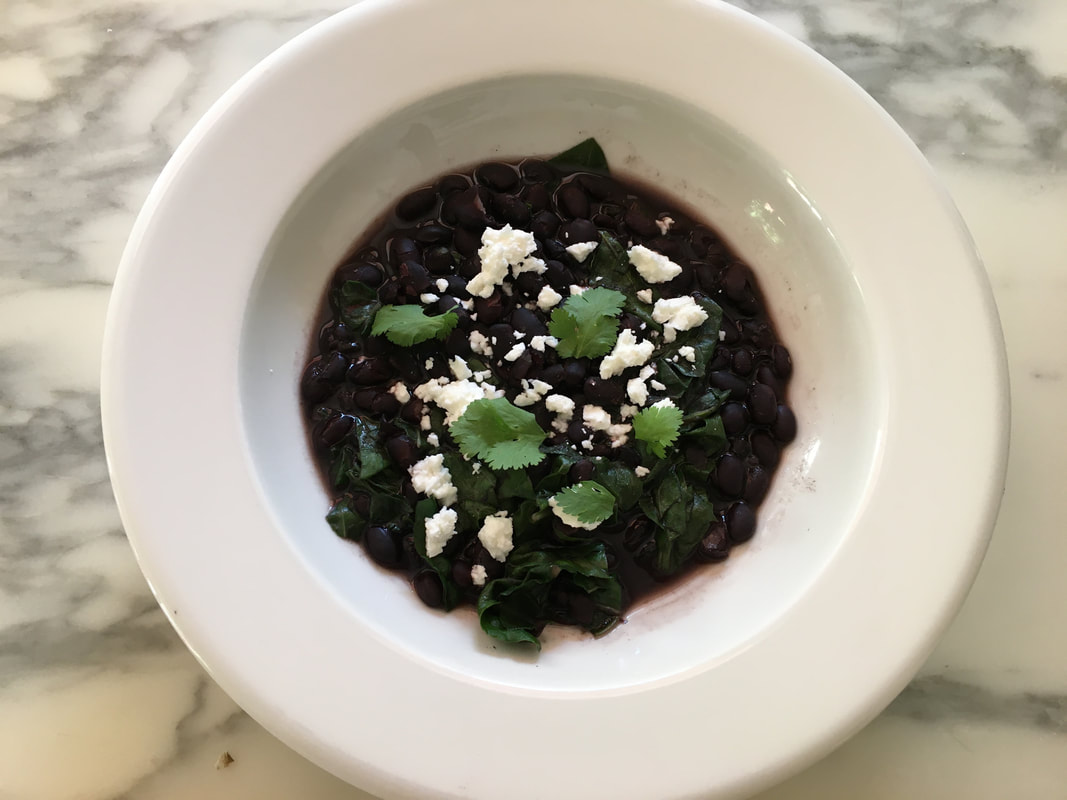
The chard was delectable too, and for more than a moment. Bob and I had a week of varied meals, beginning with a big pot of black beans with half the chard greens chopped up and added shortly before serving. The chard cooks down into the beans and the combination is comforting and nourishing – and it tastes good too! The dish is inspired by a black bean and greens soup called sopa de xonequi, from the highlands of Veracruz (xonequi is the name of the greens they use). We ate big bowls of the beans and greens, with warm corn tortillas.
The next night I cooked up some brown rice and we had grain bowls, the rice topped with black beans and greens and garnished with avocado and radishes. Bob added some hot sauce to his. So satisfying. “I didn’t know whether or not I was going to like it; I loved it!” he told me.
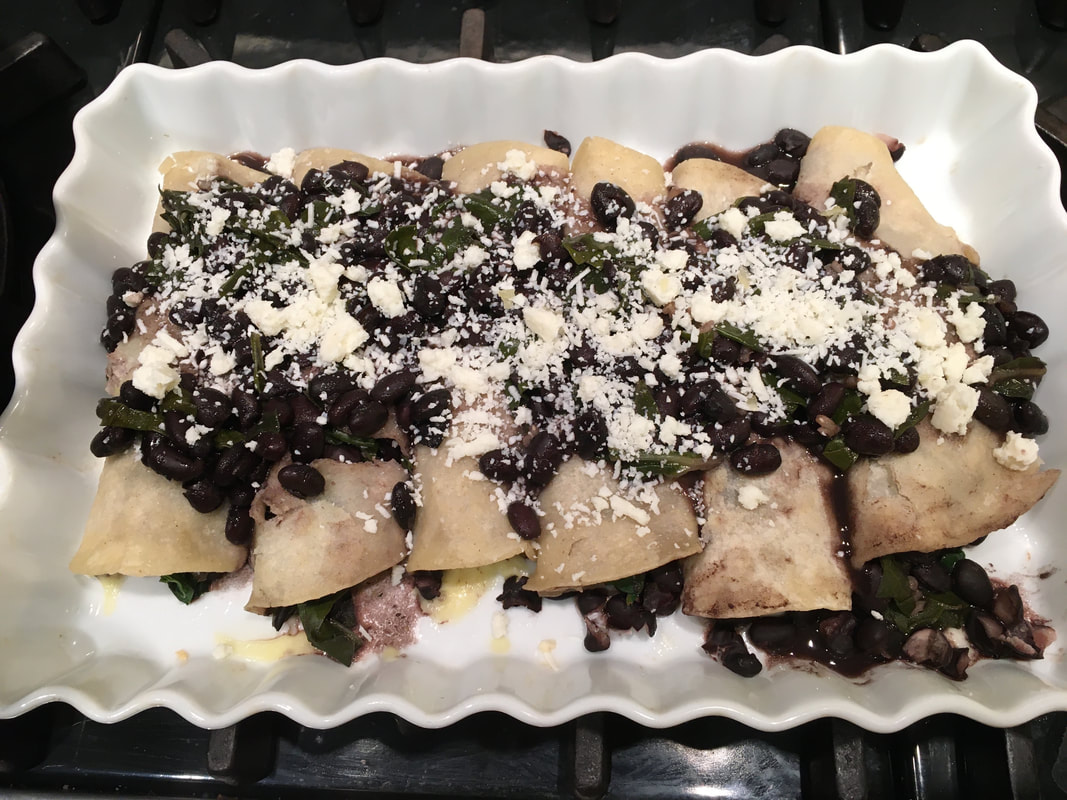
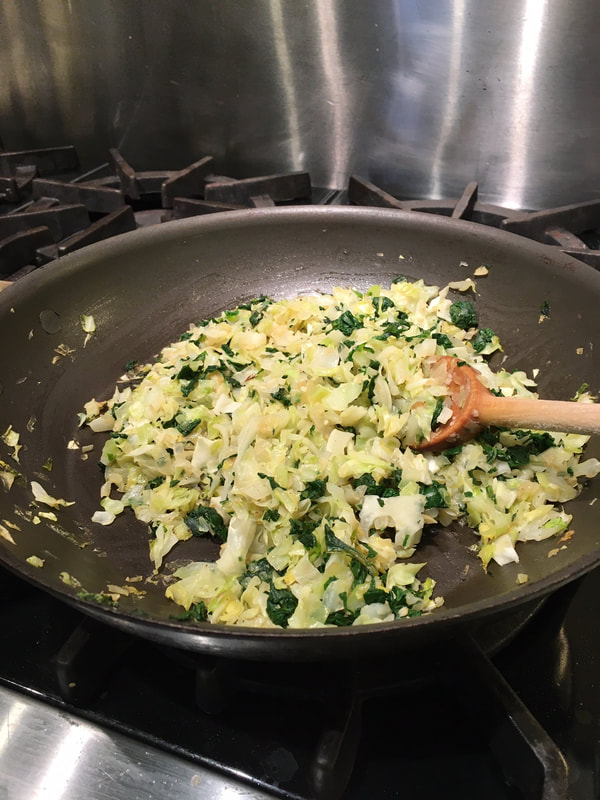
He wanted the rice bowl again the next night, but I had other ideas: black bean and greens enchiladas. I had blanched the remaining pound of Angie’s chard (bring a large pot of water to a boil, salt generously, add washed greens and let them wilt for about 1 minute, then scoop them out, transfer to a bowl of cold water, drain and squeeze out excess water. I take it up by the handful and squeeze with all my might). I added some of the brighter blanched greens to the beans and greens in the enchiladas, as well as some Monterey Jack, which melted when I baked the dish in the oven. They were topped with more beans and their sauce, and with crumbled Cotija cheese.
Meanwhile, I had saved the wide, meaty chard ribs. I have written a lot about the cuisine of Provence, where nothing goes to waste. There I learned to make a simple gratin with chard ribs and a béchamel. I added the rest of the blanched greens to this, and we feasted on it two nights in a row.
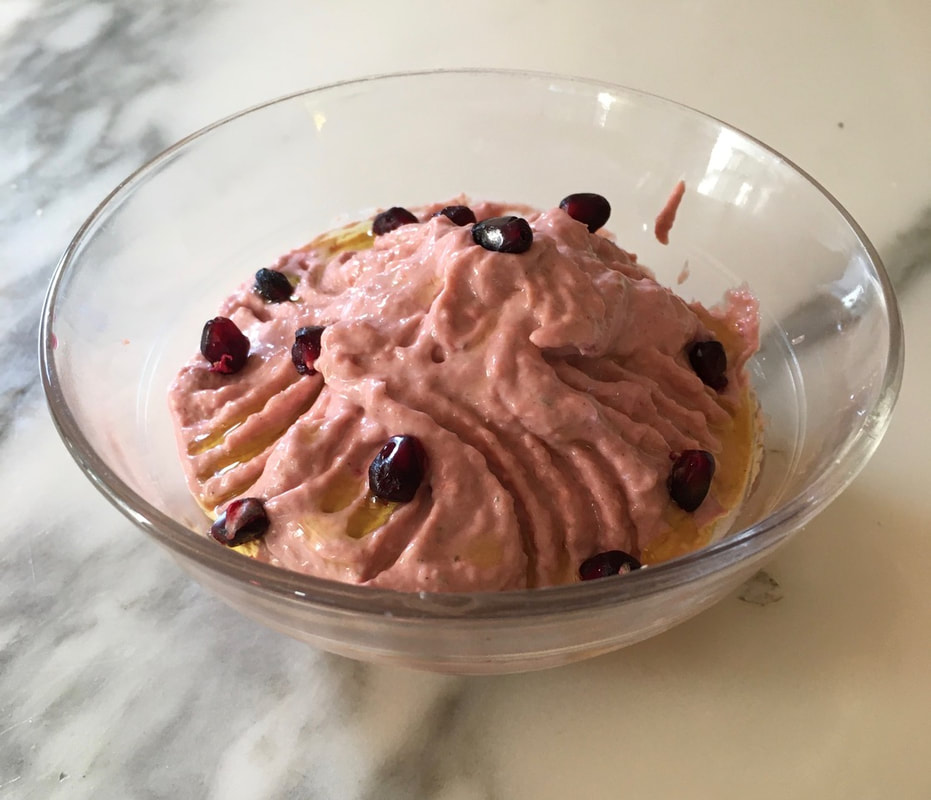
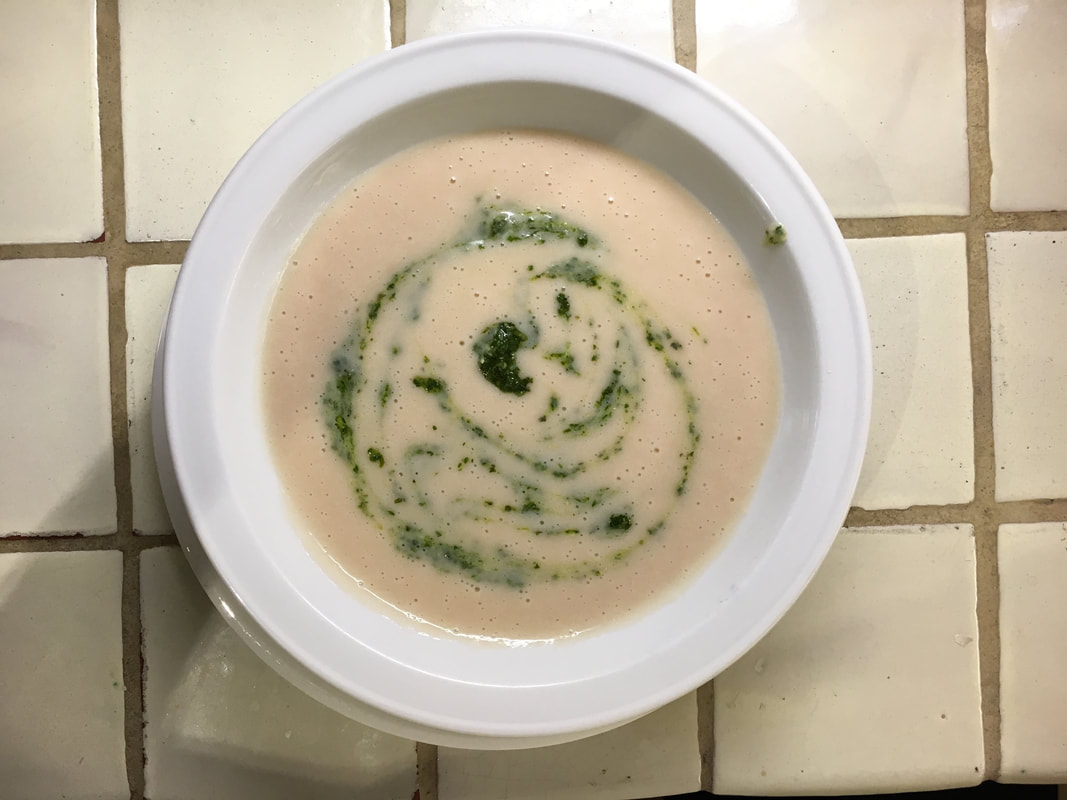
The French aren’t the only ones who are clever with chard ribs. One of my favorite Middle Eastern meze is a tahini and chard rib puree, sort of a hummus with cooked chard ribs standing in for chickpeas. Mine is pink, because I used the ribs from red chard.
It’s now been two weeks since I’ve been to a farmers market and almost that long since I’ve been to a supermarket. But I still have lots of ingredients to work with. It did help, though, having a generous friend like Angie.
Black Beans with Chard
1 pound (2 1/4 cups) black beans
1 medium or large white or yellow onion, quartered
4 garlic cloves, 2 smashed, 2 minced
¼ cup chopped cilantro (more to taste)
Salt to taste
3/4 to 1 pound (1 generous bunch) Swiss chard, stemmed, leaves washed in 2 changes of water, and roughly chopped (4 to 5 cups)
Crumbled queso blanco or feta for garnish
1. Rinse the black beans, pick them over for stones, and place in a large, heavy soup pot or casserole. Cover with 2 quarts water and soak for 4 hours or longer. Do not drain.
Note: Many cooks insist that soaking is not necessary, and if your are one of them, feel free to skip Step 1. I always find that beans cook more evenly if they are soaked.
2. Make sure the beans are covered by about 2 inches of water and add more if necessary. Bring to a boil and skim off any foam. Add the onion and the smashed garlic cloves. Reduce heat to very low, cover and simmer gently for 1 hour. Add the remaining garlic, half the cilantro, and a generous amount of salt (at least 2 teaspoons; I usually use more like 3). Continue to simmer another hour, until the beans are quite soft and the broth is thick and fragrant. Taste for salt and garlic and add more as desired. Stir in the remaining cilantro.
3. Shortly before serving bring the beans back to a simmer and stir in the greens. Add them a cup at a time and stir; you’ll see how much they reduce in volume. Simmer for 5 to 10 minutes, until the leaves are tender. Taste and adjust seasonings. Serve with a little white cheese crumbled over the top, and more cilantro, if desired.
Yield: Serves 6
Advance preparation: The beans will keep for 3 or 4 days in the refrigerator. They will taste best if you refrigerate them overnight at the end of Step 2, then reheat and proceed with step 3 when you want to serve them. The dish freezes well.
Grain Bowl with Black Beans and Chard
I love these beans ladled over brown rice. I garnish with a few slices of avocado and a couple of radishes, and serve salsa on the side.
Black Bean and Chard Enchiladas
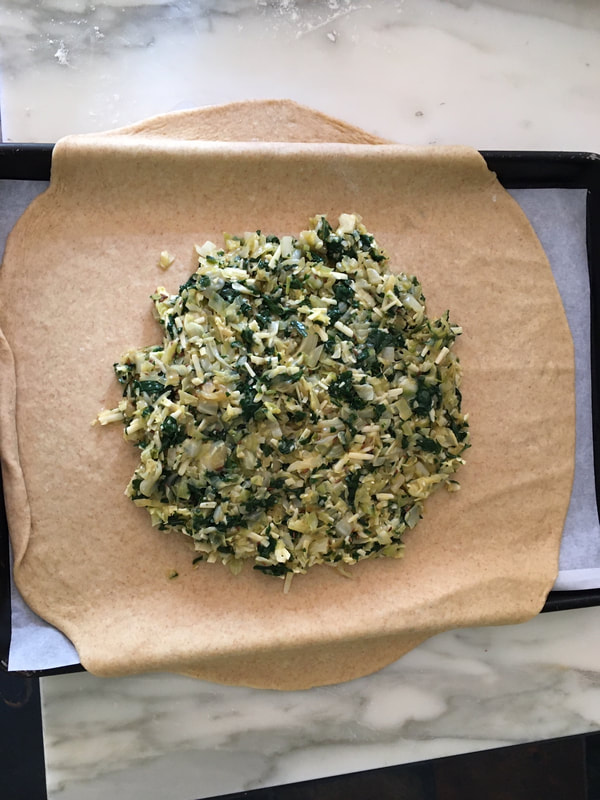
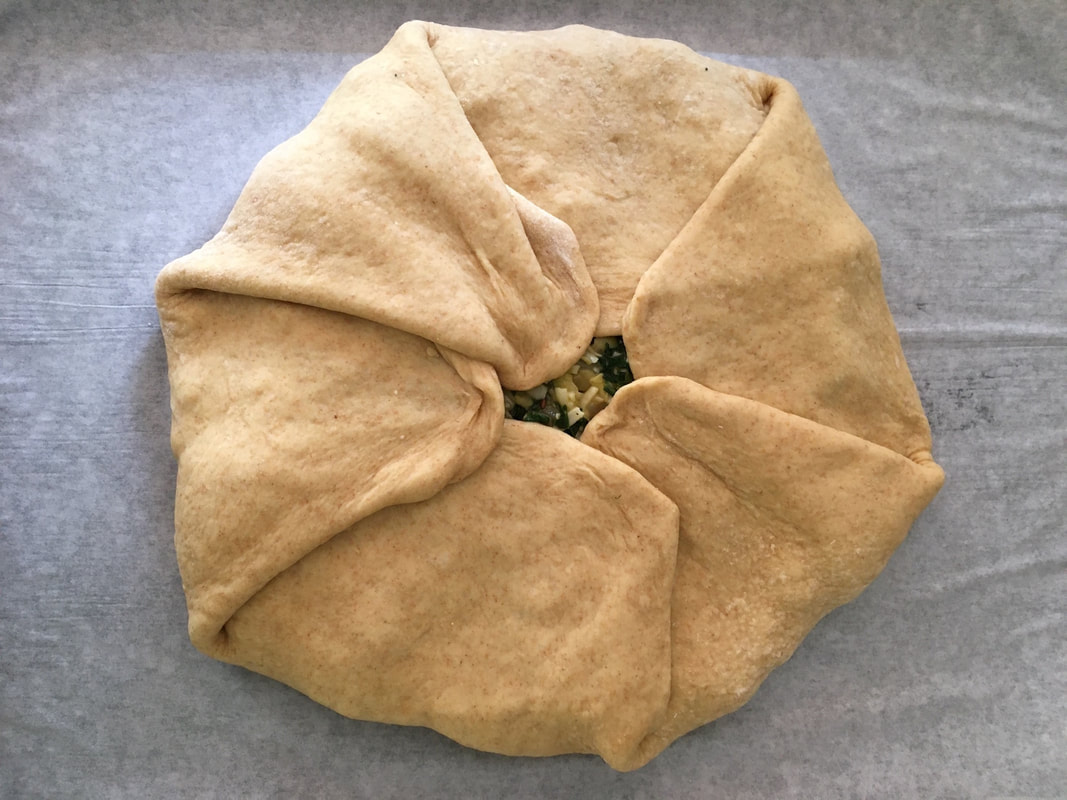
Another great destination for black beans with chard, which serves as both filling and sauce. If you haven’t used all of your chard, blanch some more and add a little to each enchilada.
Heat about 2 tablespoons vegetable oil (canola, sunflower, grape seed) over medium-high heat in a medium skillet. One by one, “pass” corn tortillas through the oil: add one to the oil and when you see it beginning to pucker and soften, turn over and repeat on the other side. Drain briefly on paper towels and transfer to a lightly oiled casserole. Spoon some of the beans onto the softened tortilla. Sprinkle with Monterey jack cheese and some additional blanched chard if you have it. Roll up the tortilla. Repeat with the remaining tortillas (I made 8 enchiladas using about a third of the total beans and greens recipe). Arrange in the baking dish and spoon more beans over the top. Sprinkle with queso fresco, queso cotija, or more Monterey jack. Cover tightly with foil and heat through for 20 minutes in a 350-degree oven, or until bubbling. Serve with salsa of your choice.
Chard and Chard Stalk Gratin
Yield: Serves 4
For the béchamel:
2 tablespoons extra virgin olive oil
2 tablespoons finely chopped shallot or onion
2 tablespoons all purpose flour
2 cups milk
Salt to taste
Freshly ground white or black pepper
For the gratin:
1-2 bunches chard with thick stalks
Salt to taste
1 tablespoon extra virgin olive oil
1 to 2 garlic cloves, minced (optional)
Freshly ground pepper
1/4 cup freshly grated Parmesan
1. Make the béchamel. Heat the oil over medium heat in a heavy medium saucepan. Add the shallot or onion and cook, stirring, until softened, 2 to 3 minutes. Stir in flour and cook, stirring, for about 3 minutes, until smooth and bubbling, but not browned. It should have the texture of wet sand. Whisk in the milk all at once and bring to a simmer, whisking all the while, until the mixture begins to thicken. Turn the heat to very low and simmer, stirring often with a whisk and scraping the bottom and edges of the pan with a rubber spatula, for 15 minutes, until the sauce is thick and has lost its raw flour taste. Season with salt and pepper. Strain while hot into a heat-proof bowl or a pyrex measuring cup.
2. Bring a large pot of water to a boil while you stem the chard. Fill a bowl with cold water. Wash the greens in 2 changes of water and set aside. Wash the stems thoroughly, trim away the ends. When the water in the pot comes to a boil, salt generously and add the chard stalks. Turn the heat down to medium and boil gently for 5 to 7 minutes, until the stalks are just cooked through. Remove from the pot with a skimmer or a slotted spoon, transfer to a bowl of cold water, then drain and dry on paper towels. Slice about 3/4 inch thick. If not using right away, line a bowl with paper towels and place the stalks in the bowl. Refrigerate uncovered.
3. Bring the water in the pot back to a boil and add the greens. Blanch for 1 to 2 minutes, until tender, and transfer to a bowl of cold water. Allow to cool for a couple of minutes, then drain and squeeze out excess water. Chop coarsely. NOTE: You don’t have to use all of the greens in the gratin; you can save some for another dish.
4. Preheat the oven to 400ºF. Oil a 1 1/2- to 2-quart gratin dish. Heat 1 tablespoon olive oil over medium heat in a medium skillet and add the garlic. When the garlic begins to smell fragrant, after about 30 seconds, stir in the chopped blanched chard leaves and cook for 30 seconds to a minute, just to infuse the greens with garlic. Season with salt and pepper and transfer to a large bowl. Add the chard stems, the béchamel and freshly ground pepper to taste. Gently stir together, and scrape into the gratin dish. Sprinkle the Parmesan over the top. Place in the oven for about 20 to 25 minutes, until bubbling and the top begins to brown. Remove from the heat and allow to cool until the bubbling has subsided, then serve.
Note: You can make this dish with the chard stalks only if you want to use the greens for something else. In Provence they also add an anchovy or two, mashed, to the béchamel.
Advance preparation: The dish can be assembled up to a day before baking and held in the refrigerator, tightly covered.
Chard Stalk and Tahini Dip
You can make smaller amounts of this, depending on your chard stalk supply. If you like hummus you’ll love this lighter version.
1/2 pound Swiss chard stalks, coarsely chopped (about 2 cups)
Salt to taste
1 to 2 garlic cloves (to taste), peeled, green shoots removed
1/4 cup sesame tahini, stirred if the oil has separated
2 tablespoons freshly squeezed lemon juice, ,ore to taste
1 tablespoon extra-virgin olive oil, plus additional for garnish
pomegranate seeds for garnish (optional)
1. Steam or blanch the chard stalks in salted boiling water until tender when pierced with a fork, about 5 minutes. Drain well and allow to cool. Place in a food processor fitted with the steel blade. Puree, stopping the machine from time to time to scrape down the sides. Add the garlic and process until smooth. Add the tahini and process until smooth. With the machine running, add the lemon juice and olive oil, and salt to taste. Stop the machine, taste and adjust seasonings.
3. Transfer the dip to a wide bowl. It will be a little runny (unless the tahini you used was thick) but will stiffen up. Drizzle on the olive oil and serve.
Advance preparation: This will be good for about 3 days, but the fresher it is, the better.
The chard was delectable too, and for more than a moment. Bob and I had a week of varied meals, beginning with a big pot of black beans with half the chard greens chopped up and added shortly before serving. The chard cooks down into the beans and the combination is comforting and nourishing – and it tastes good too! The dish is inspired by a black bean and greens soup called sopa de xonequi, from the highlands of Veracruz (xonequi is the name of the greens they use). We ate big bowls of the beans and greens, with warm corn tortillas.
The next night I cooked up some brown rice and we had grain bowls, the rice topped with black beans and greens and garnished with avocado and radishes. Bob added some hot sauce to his. So satisfying. “I didn’t know whether or not I was going to like it; I loved it!” he told me.
He wanted the rice bowl again the next night, but I had other ideas: black bean and greens enchiladas. I had blanched the remaining pound of Angie’s chard (bring a large pot of water to a boil, salt generously, add washed greens and let them wilt for about 1 minute, then scoop them out, transfer to a bowl of cold water, drain and squeeze out excess water. I take it up by the handful and squeeze with all my might). I added some of the brighter blanched greens to the beans and greens in the enchiladas, as well as some Monterey Jack, which melted when I baked the dish in the oven. They were topped with more beans and their sauce, and with crumbled Cotija cheese.
Meanwhile, I had saved the wide, meaty chard ribs. I have written a lot about the cuisine of Provence, where nothing goes to waste. There I learned to make a simple gratin with chard ribs and a béchamel. I added the rest of the blanched greens to this, and we feasted on it two nights in a row.
The French aren’t the only ones who are clever with chard ribs. One of my favorite Middle Eastern meze is a tahini and chard rib puree, sort of a hummus with cooked chard ribs standing in for chickpeas. Mine is pink, because I used the ribs from red chard.
It’s now been two weeks since I’ve been to a farmers market and almost that long since I’ve been to a supermarket. But I still have lots of ingredients to work with. It did help, though, having a generous friend like Angie.
Black Beans with Chard
1 pound (2 1/4 cups) black beans
1 medium or large white or yellow onion, quartered
4 garlic cloves, 2 smashed, 2 minced
¼ cup chopped cilantro (more to taste)
Salt to taste
3/4 to 1 pound (1 generous bunch) Swiss chard, stemmed, leaves washed in 2 changes of water, and roughly chopped (4 to 5 cups)
Crumbled queso blanco or feta for garnish
1. Rinse the black beans, pick them over for stones, and place in a large, heavy soup pot or casserole. Cover with 2 quarts water and soak for 4 hours or longer. Do not drain.
Note: Many cooks insist that soaking is not necessary, and if your are one of them, feel free to skip Step 1. I always find that beans cook more evenly if they are soaked.
2. Make sure the beans are covered by about 2 inches of water and add more if necessary. Bring to a boil and skim off any foam. Add the onion and the smashed garlic cloves. Reduce heat to very low, cover and simmer gently for 1 hour. Add the remaining garlic, half the cilantro, and a generous amount of salt (at least 2 teaspoons; I usually use more like 3). Continue to simmer another hour, until the beans are quite soft and the broth is thick and fragrant. Taste for salt and garlic and add more as desired. Stir in the remaining cilantro.
3. Shortly before serving bring the beans back to a simmer and stir in the greens. Add them a cup at a time and stir; you’ll see how much they reduce in volume. Simmer for 5 to 10 minutes, until the leaves are tender. Taste and adjust seasonings. Serve with a little white cheese crumbled over the top, and more cilantro, if desired.
Yield: Serves 6
Advance preparation: The beans will keep for 3 or 4 days in the refrigerator. They will taste best if you refrigerate them overnight at the end of Step 2, then reheat and proceed with step 3 when you want to serve them. The dish freezes well.
Grain Bowl with Black Beans and Chard
I love these beans ladled over brown rice. I garnish with a few slices of avocado and a couple of radishes, and serve salsa on the side.
Black Bean and Chard Enchiladas
Another great destination for black beans with chard, which serves as both filling and sauce. If you haven’t used all of your chard, blanch some more and add a little to each enchilada.
Heat about 2 tablespoons vegetable oil (canola, sunflower, grape seed) over medium-high heat in a medium skillet. One by one, “pass” corn tortillas through the oil: add one to the oil and when you see it beginning to pucker and soften, turn over and repeat on the other side. Drain briefly on paper towels and transfer to a lightly oiled casserole. Spoon some of the beans onto the softened tortilla. Sprinkle with Monterey jack cheese and some additional blanched chard if you have it. Roll up the tortilla. Repeat with the remaining tortillas (I made 8 enchiladas using about a third of the total beans and greens recipe). Arrange in the baking dish and spoon more beans over the top. Sprinkle with queso fresco, queso cotija, or more Monterey jack. Cover tightly with foil and heat through for 20 minutes in a 350-degree oven, or until bubbling. Serve with salsa of your choice.
Chard and Chard Stalk Gratin
Yield: Serves 4
For the béchamel:
2 tablespoons extra virgin olive oil
2 tablespoons finely chopped shallot or onion
2 tablespoons all purpose flour
2 cups milk
Salt to taste
Freshly ground white or black pepper
For the gratin:
1-2 bunches chard with thick stalks
Salt to taste
1 tablespoon extra virgin olive oil
1 to 2 garlic cloves, minced (optional)
Freshly ground pepper
1/4 cup freshly grated Parmesan
1. Make the béchamel. Heat the oil over medium heat in a heavy medium saucepan. Add the shallot or onion and cook, stirring, until softened, 2 to 3 minutes. Stir in flour and cook, stirring, for about 3 minutes, until smooth and bubbling, but not browned. It should have the texture of wet sand. Whisk in the milk all at once and bring to a simmer, whisking all the while, until the mixture begins to thicken. Turn the heat to very low and simmer, stirring often with a whisk and scraping the bottom and edges of the pan with a rubber spatula, for 15 minutes, until the sauce is thick and has lost its raw flour taste. Season with salt and pepper. Strain while hot into a heat-proof bowl or a pyrex measuring cup.
2. Bring a large pot of water to a boil while you stem the chard. Fill a bowl with cold water. Wash the greens in 2 changes of water and set aside. Wash the stems thoroughly, trim away the ends. When the water in the pot comes to a boil, salt generously and add the chard stalks. Turn the heat down to medium and boil gently for 5 to 7 minutes, until the stalks are just cooked through. Remove from the pot with a skimmer or a slotted spoon, transfer to a bowl of cold water, then drain and dry on paper towels. Slice about 3/4 inch thick. If not using right away, line a bowl with paper towels and place the stalks in the bowl. Refrigerate uncovered.
3. Bring the water in the pot back to a boil and add the greens. Blanch for 1 to 2 minutes, until tender, and transfer to a bowl of cold water. Allow to cool for a couple of minutes, then drain and squeeze out excess water. Chop coarsely. NOTE: You don’t have to use all of the greens in the gratin; you can save some for another dish.
4. Preheat the oven to 400ºF. Oil a 1 1/2- to 2-quart gratin dish. Heat 1 tablespoon olive oil over medium heat in a medium skillet and add the garlic. When the garlic begins to smell fragrant, after about 30 seconds, stir in the chopped blanched chard leaves and cook for 30 seconds to a minute, just to infuse the greens with garlic. Season with salt and pepper and transfer to a large bowl. Add the chard stems, the béchamel and freshly ground pepper to taste. Gently stir together, and scrape into the gratin dish. Sprinkle the Parmesan over the top. Place in the oven for about 20 to 25 minutes, until bubbling and the top begins to brown. Remove from the heat and allow to cool until the bubbling has subsided, then serve.
Note: You can make this dish with the chard stalks only if you want to use the greens for something else. In Provence they also add an anchovy or two, mashed, to the béchamel.
Advance preparation: The dish can be assembled up to a day before baking and held in the refrigerator, tightly covered.
Chard Stalk and Tahini Dip
You can make smaller amounts of this, depending on your chard stalk supply. If you like hummus you’ll love this lighter version.
1/2 pound Swiss chard stalks, coarsely chopped (about 2 cups)
Salt to taste
1 to 2 garlic cloves (to taste), peeled, green shoots removed
1/4 cup sesame tahini, stirred if the oil has separated
2 tablespoons freshly squeezed lemon juice, ,ore to taste
1 tablespoon extra-virgin olive oil, plus additional for garnish
pomegranate seeds for garnish (optional)
1. Steam or blanch the chard stalks in salted boiling water until tender when pierced with a fork, about 5 minutes. Drain well and allow to cool. Place in a food processor fitted with the steel blade. Puree, stopping the machine from time to time to scrape down the sides. Add the garlic and process until smooth. Add the tahini and process until smooth. With the machine running, add the lemon juice and olive oil, and salt to taste. Stop the machine, taste and adjust seasonings.
3. Transfer the dip to a wide bowl. It will be a little runny (unless the tahini you used was thick) but will stiffen up. Drizzle on the olive oil and serve.
Advance preparation: This will be good for about 3 days, but the fresher it is, the better.


 RSS Feed
